Email Signature Generator
Using this form you can generate an email signature that will match the style recommended by the Office of Communications and Marketing.
Complete the desired fields and select the Copy to Clipboard button before following the relevant paste instructions for your email client.
Copy and Paste Instructions
To ensure your signature retains its styling, please take note of the specific instructions for your specific email client(s).
Microsoft Outlook for macOS
1. Open settings
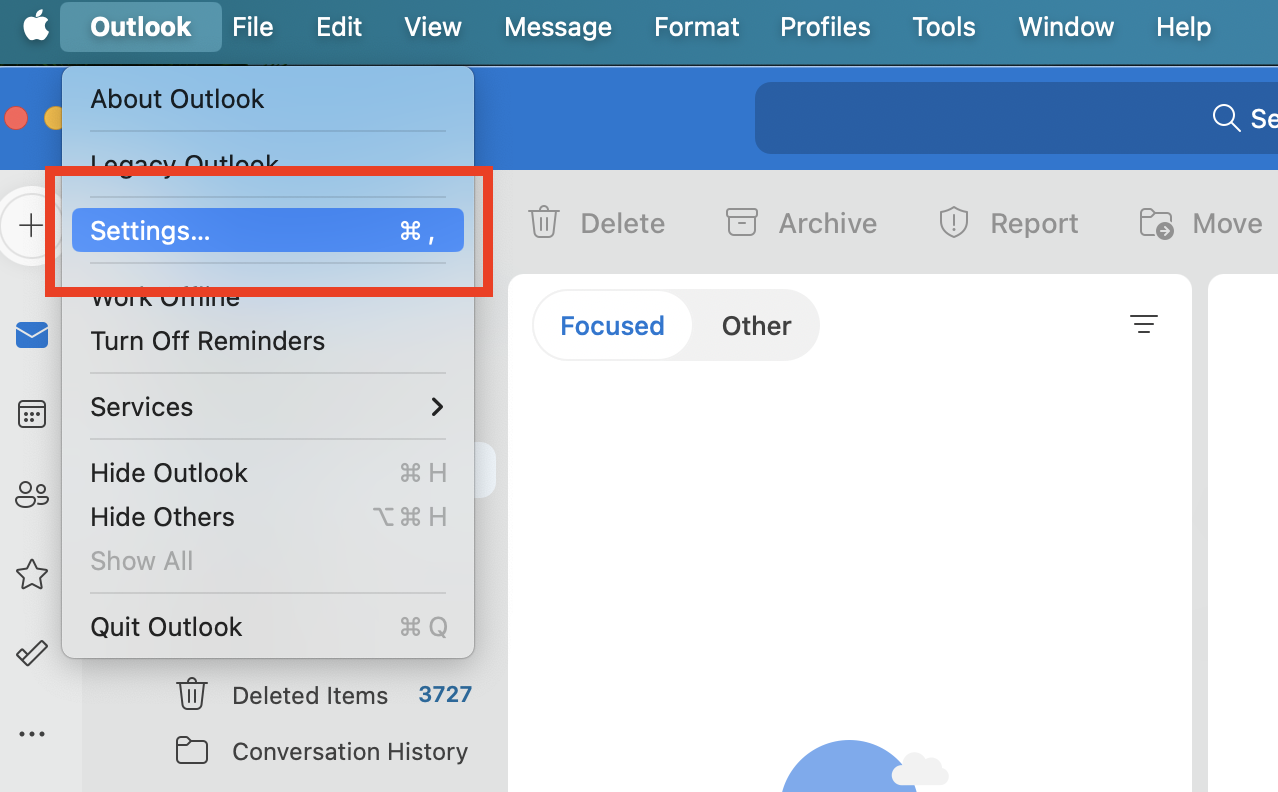
2. Select “Signatures” option
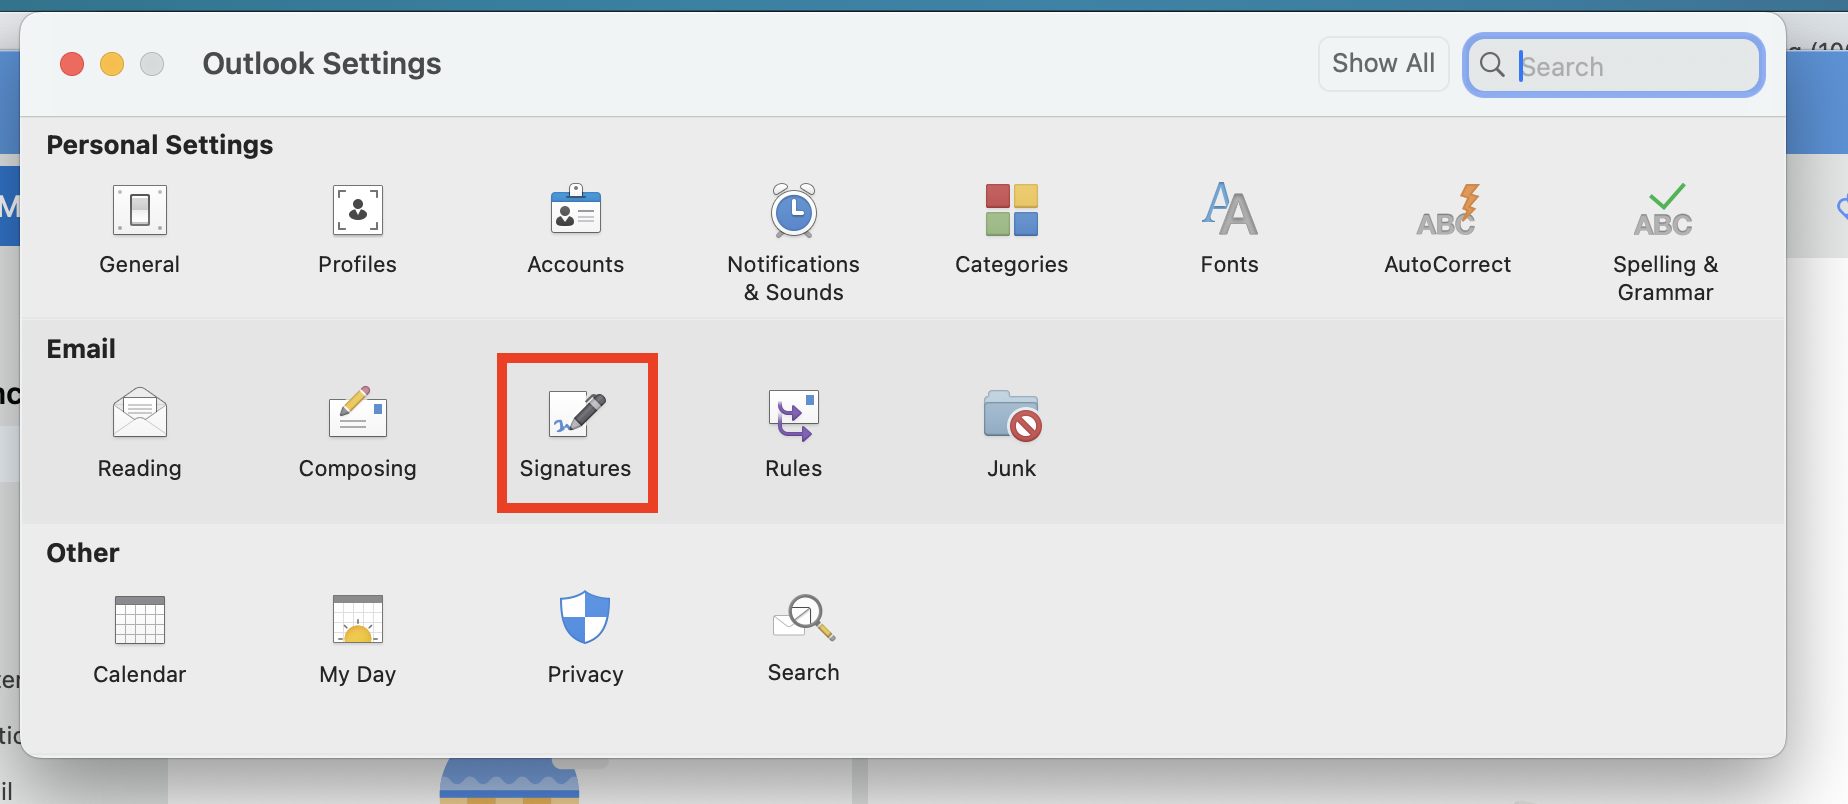
3. Select the “+” button to create new signature
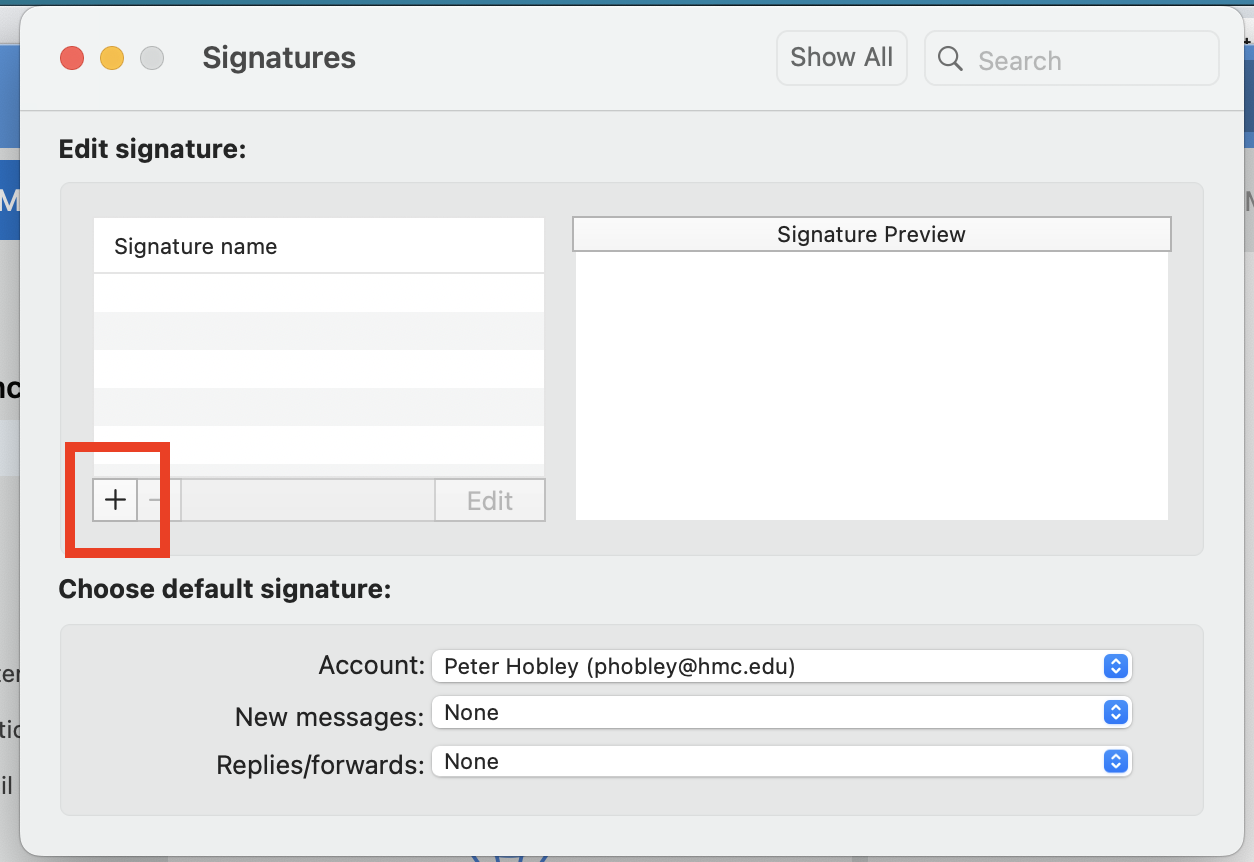
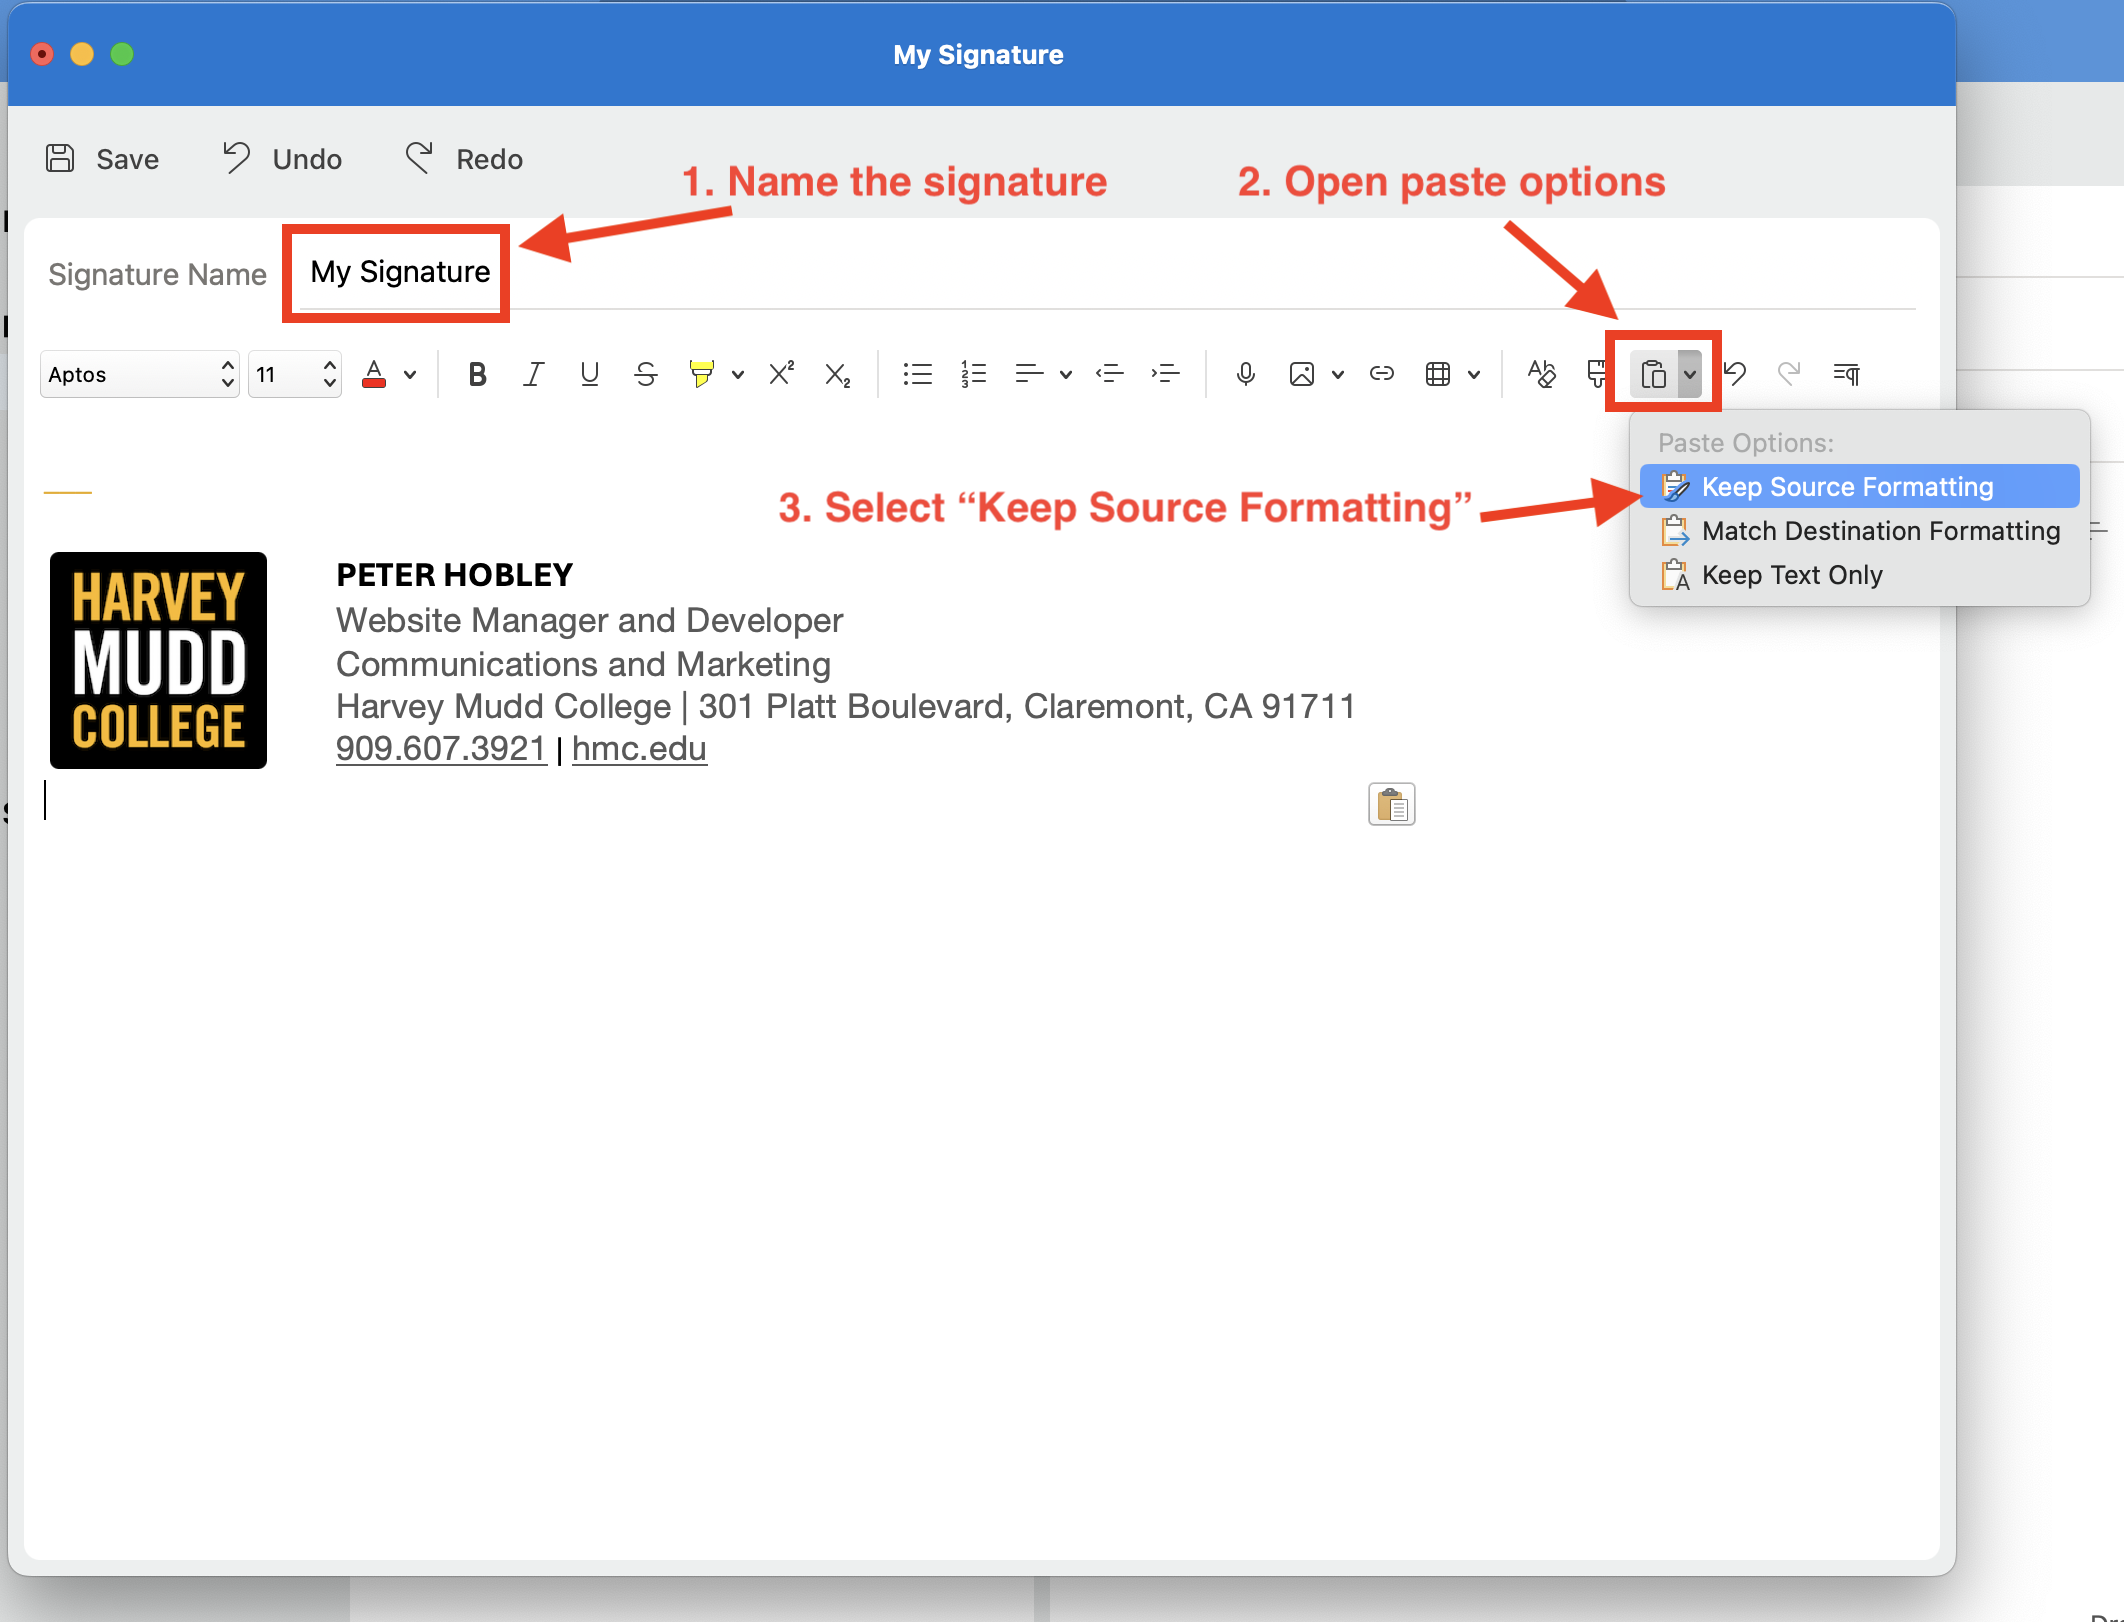
4. Name your signature and paste
Note: for the next steps, paste your signature as shown.
- Name the signature
- Select the paste options dropdown
- Select Keep Source Formatting to ensure you signature retains its styling
- Save your new signature
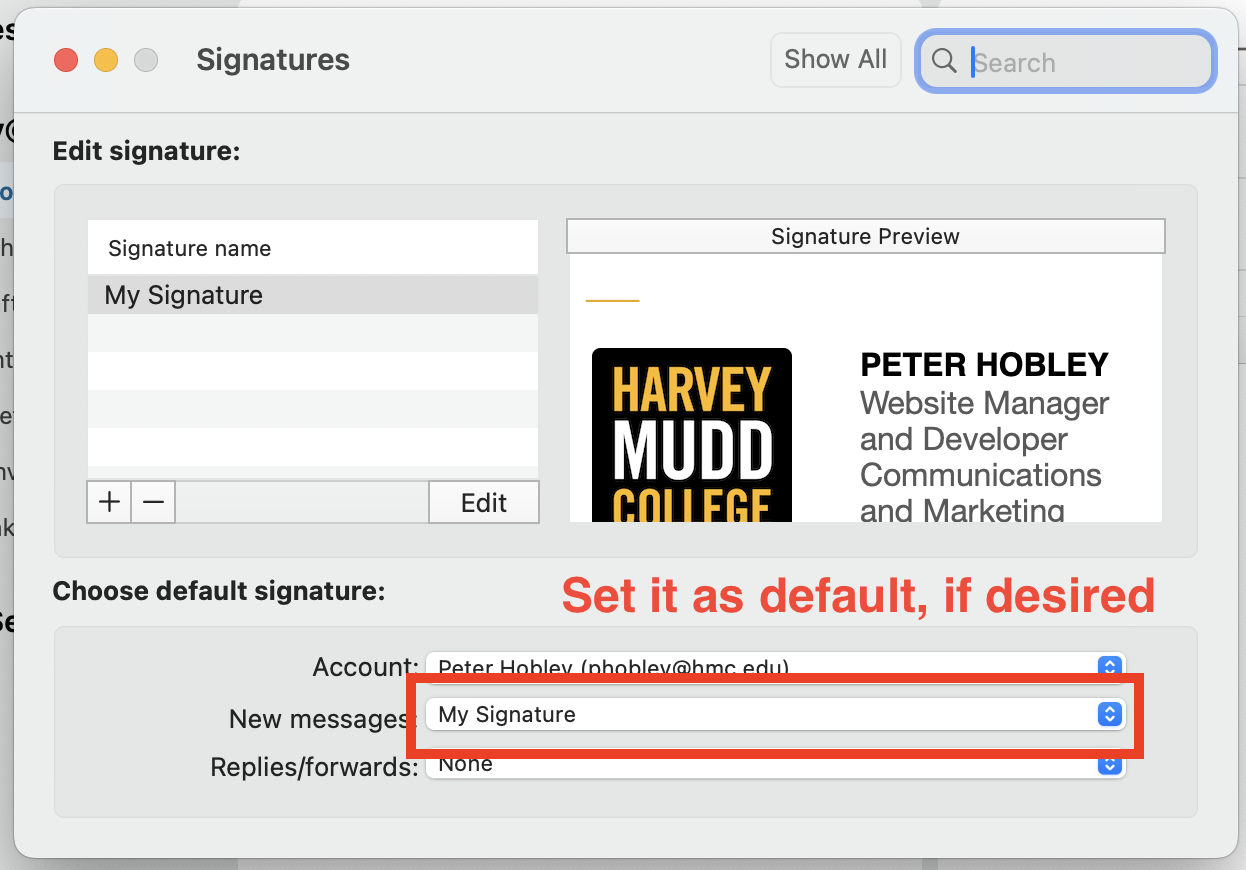
5. Set as default, if desired
Microsoft 365 Outlook (Web)
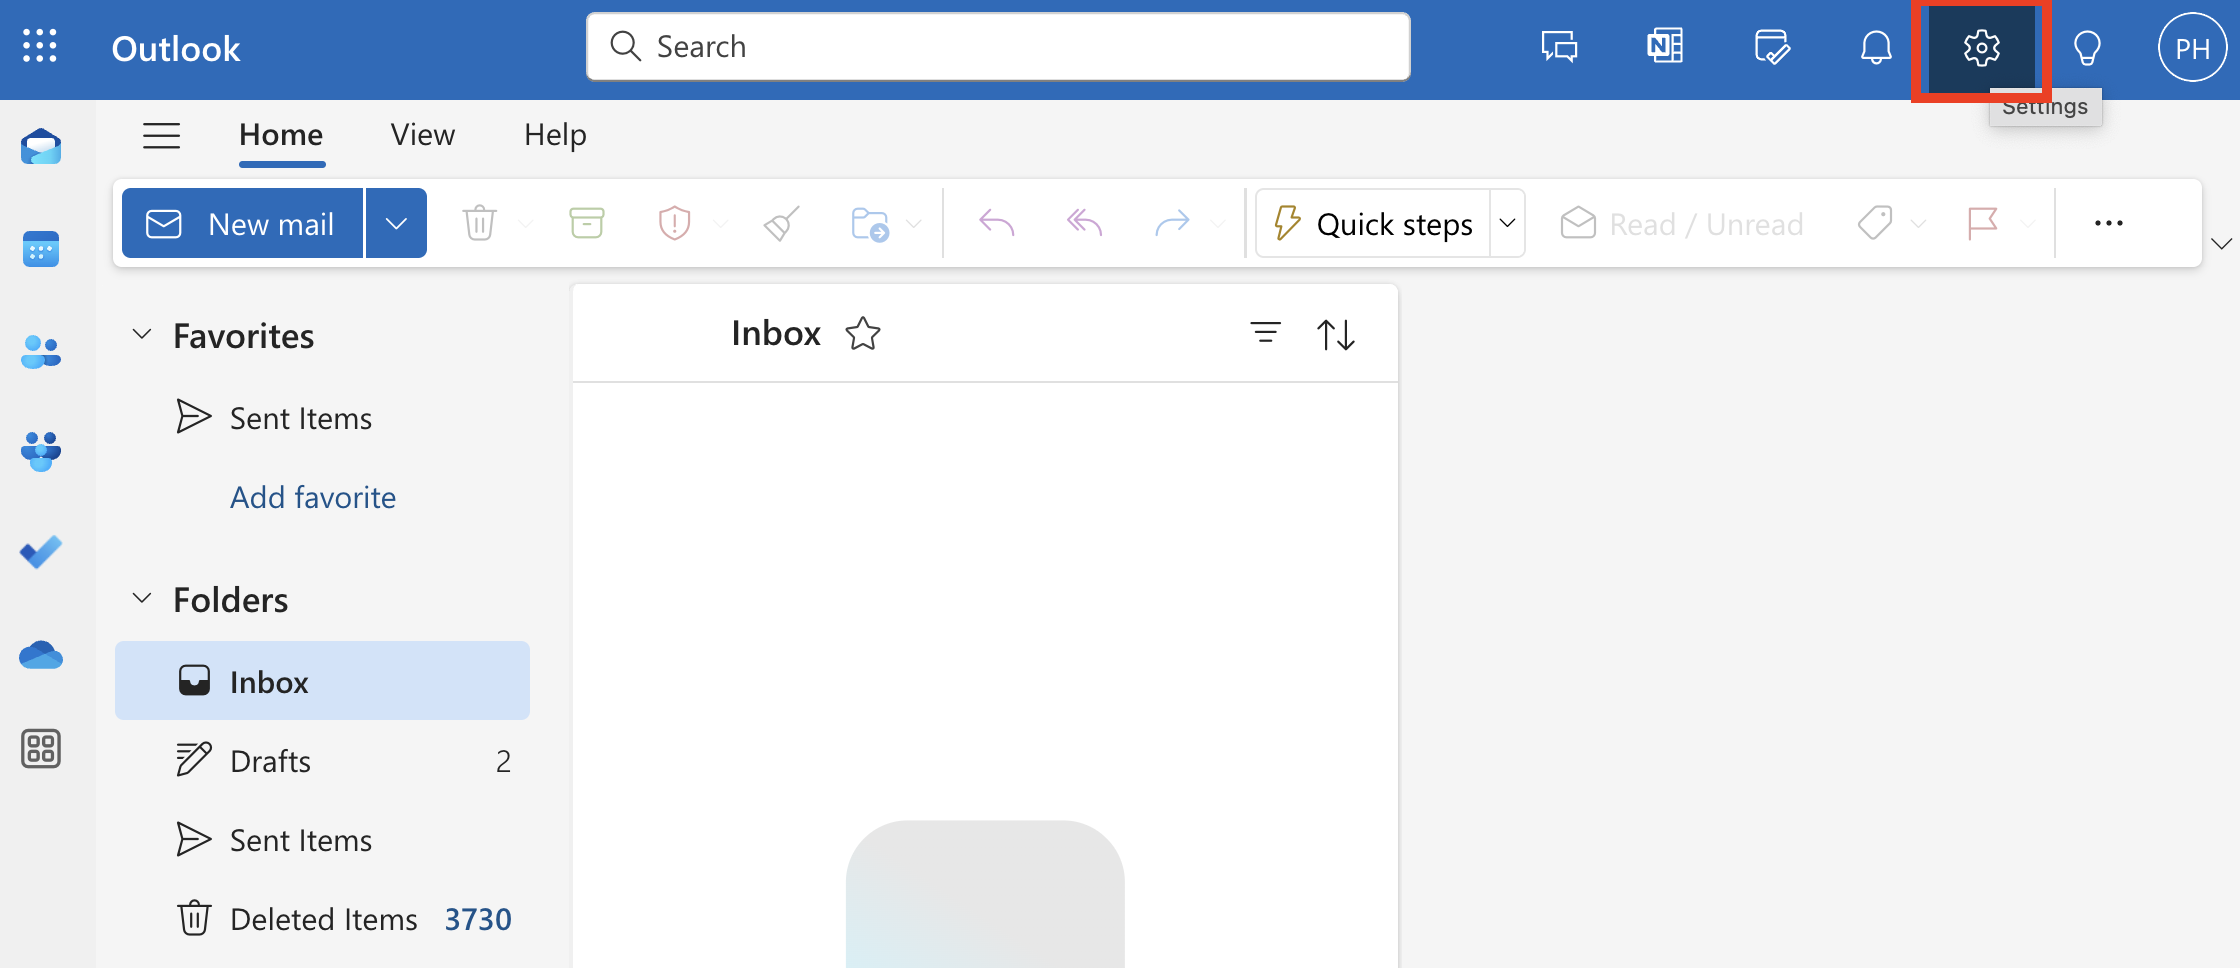
1. Open settings
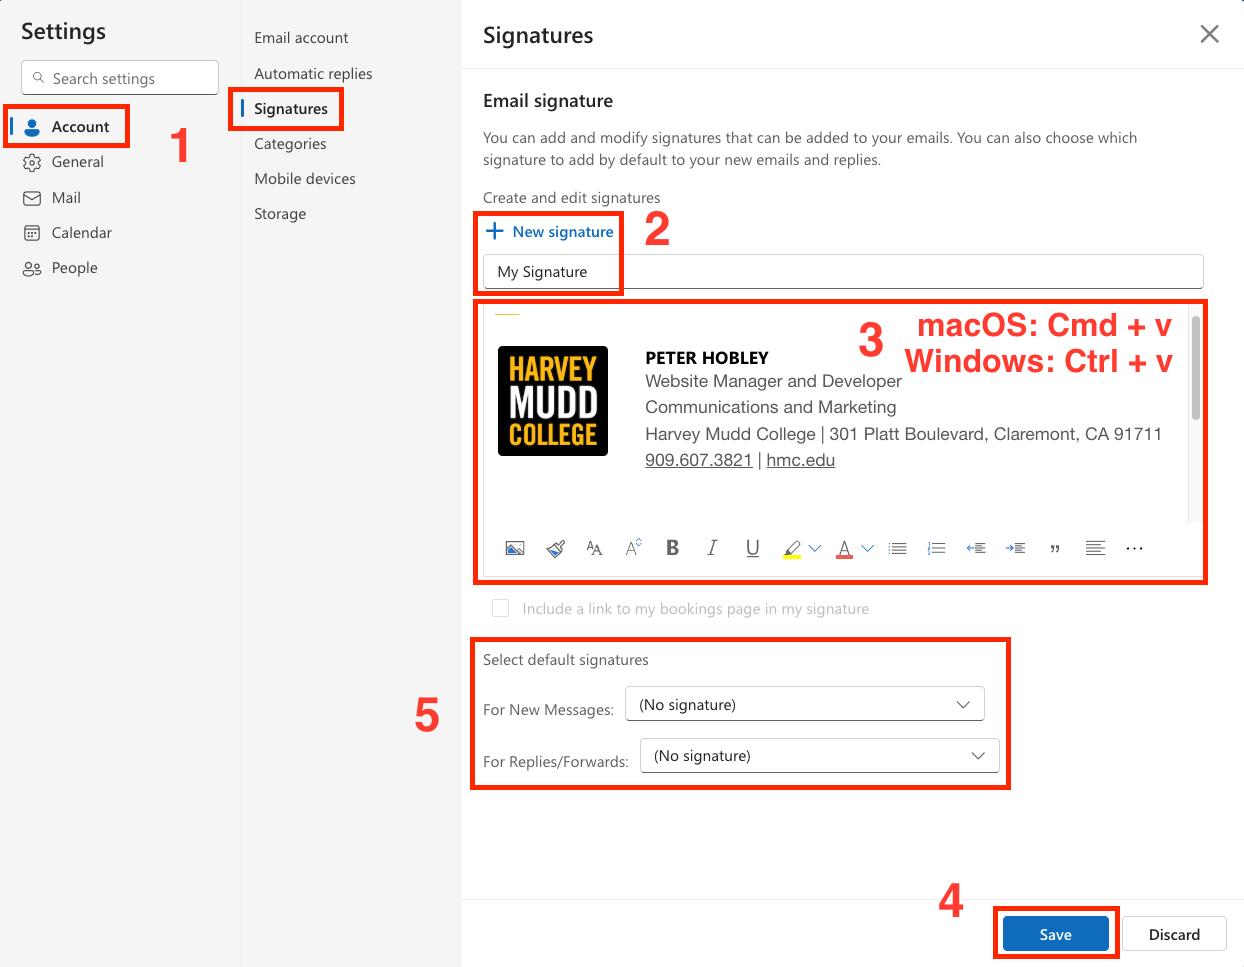
2. Select “Account” and “Signatures” settings
Note: to retain the signature styles, when pasting into the signature box you must use keyboard commands as shown, rather than selecting the paste menu option.
- Ensure you are viewing the Account settings with Signatures sub-menu selected.
- Select New signature and enter a name
- Click in the signature box
- For macOS, use Cmd + v to paste
- For Windows use Ctrl + v to paste
- Save your new signature
- If desired, set your new signature as default and select Save (note: you must save the signature before setting it as default, then select save once more).
Outlook for Windows (Classic)
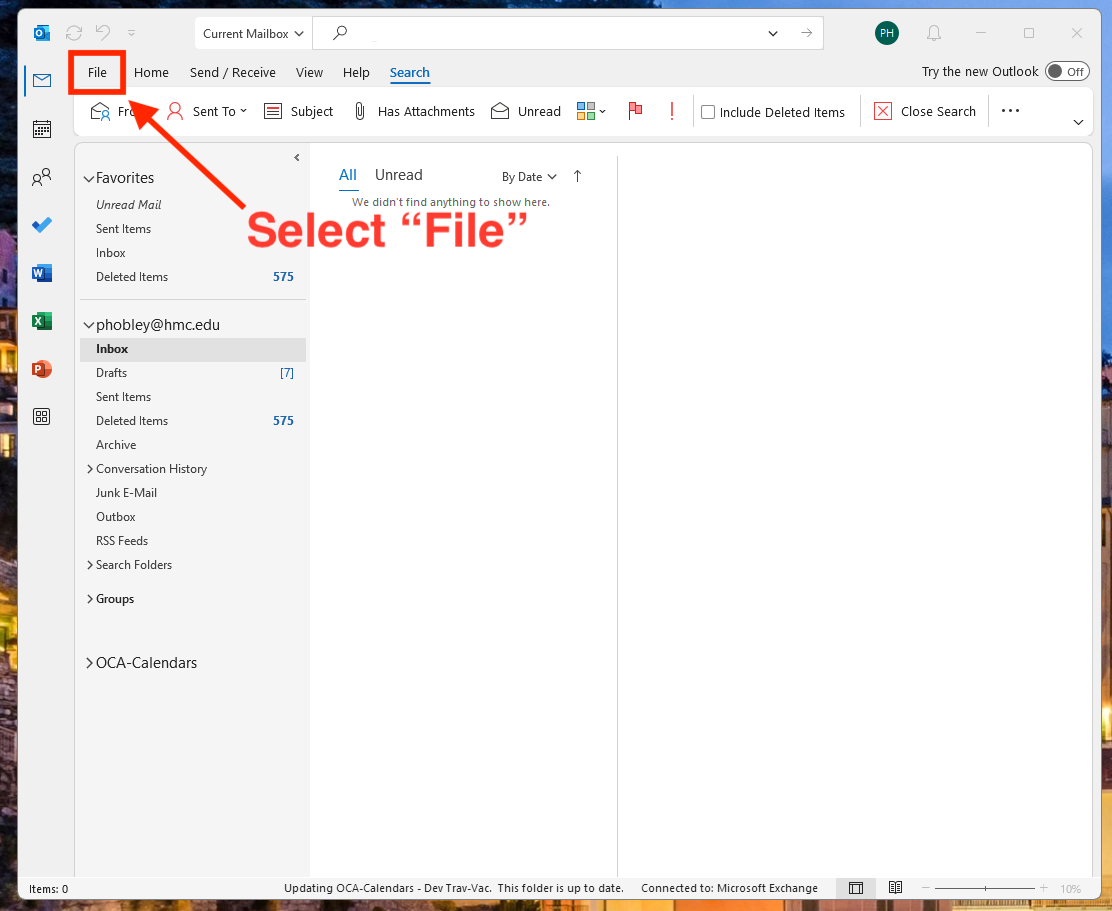
1. On the Mail page, select “File”
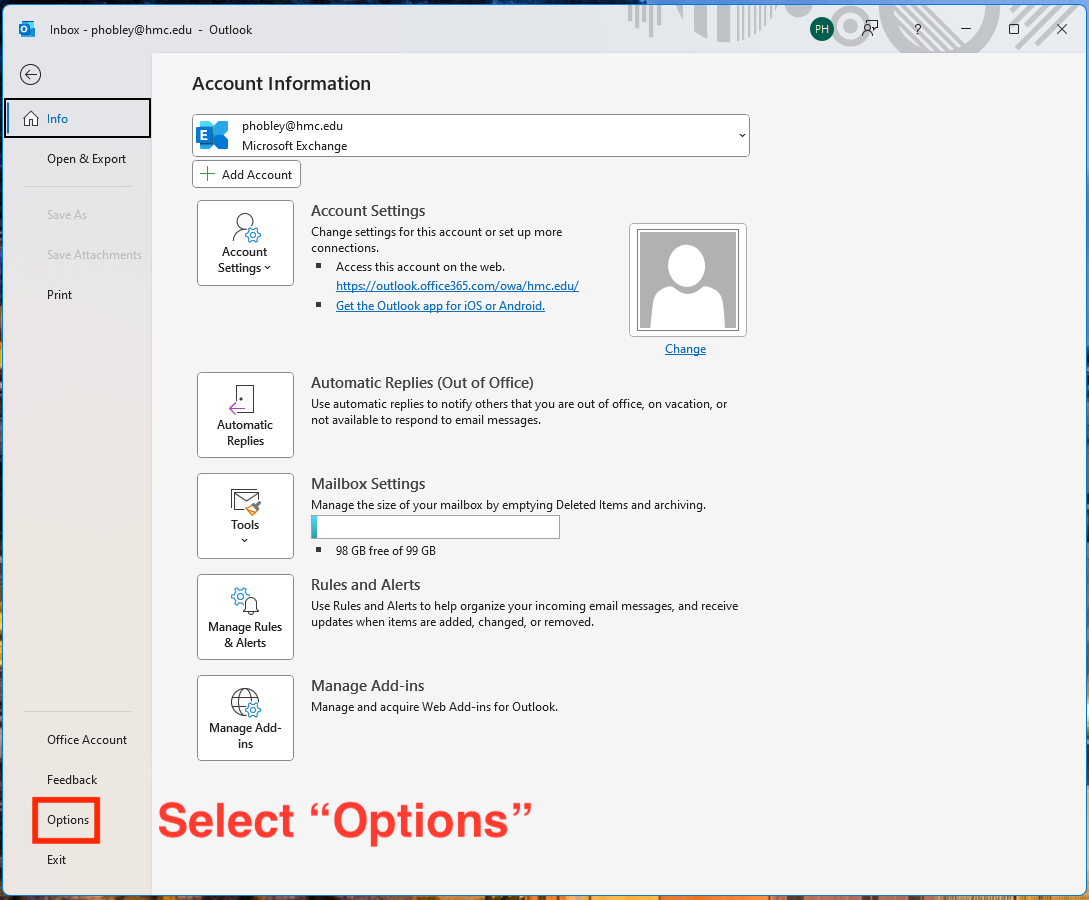
2. Select “Options”
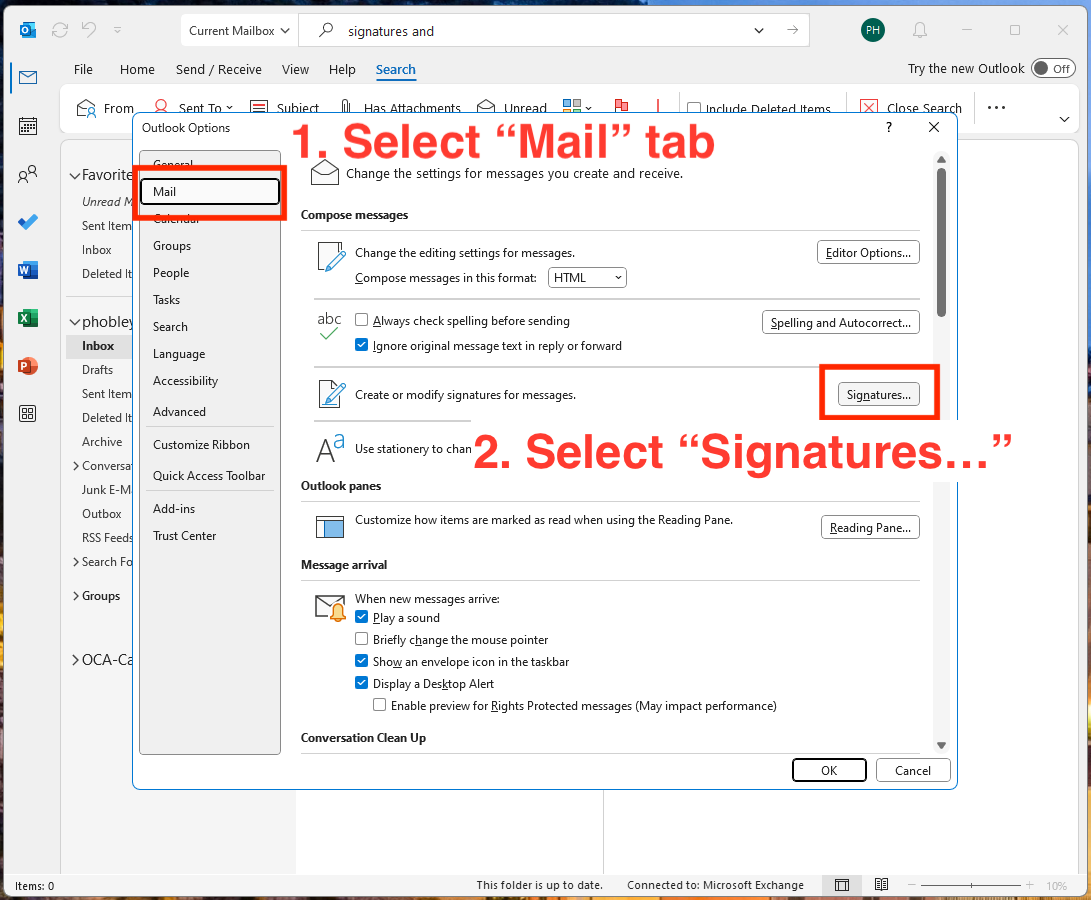
3. Open the signature settings
- Make sure you have the Mail tab selected
- Select the Signatures… button
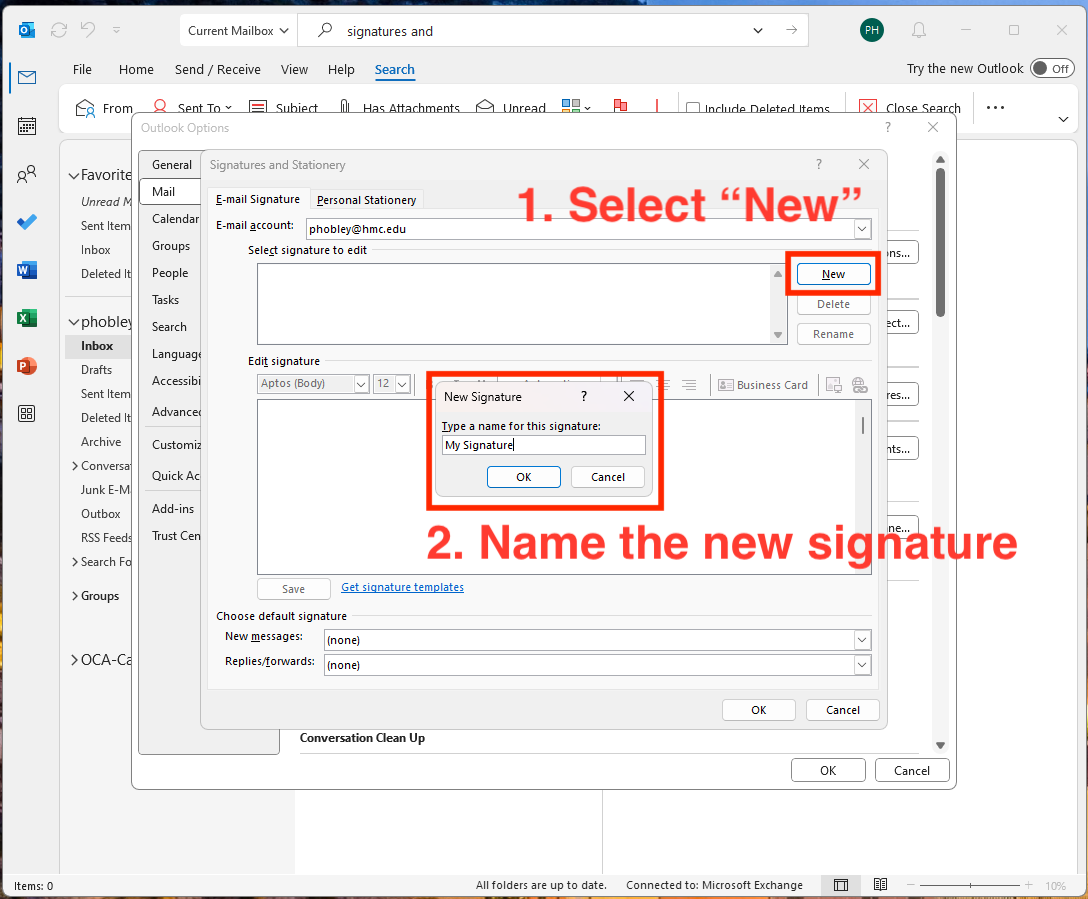
4. Create and name your new signature
- Select the New button
- Name your signature and select Ok
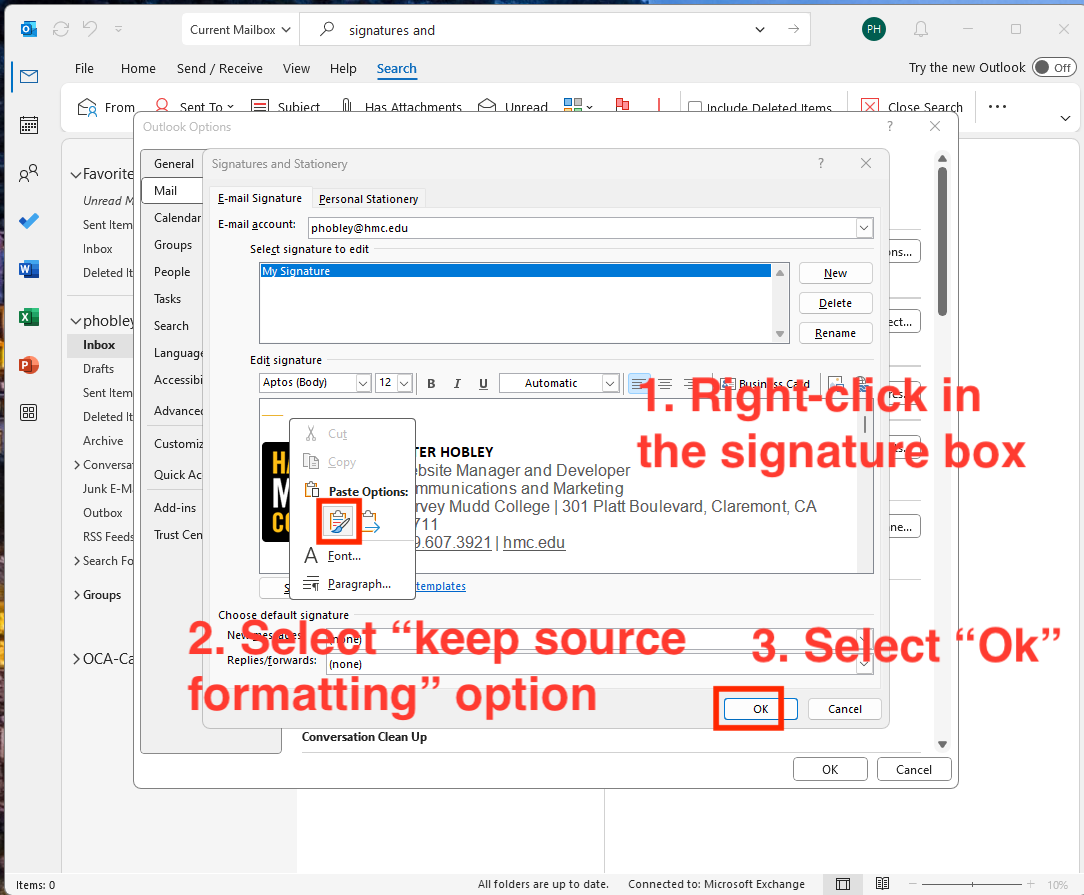
5. Paste your new signature
- After copying the signature from the generator, right-click in the signature box
- In the pop-up, under Paste Options, select the first icon which, when hovered, should say “keep source formatting.”
- Select Ok to save the new signature.
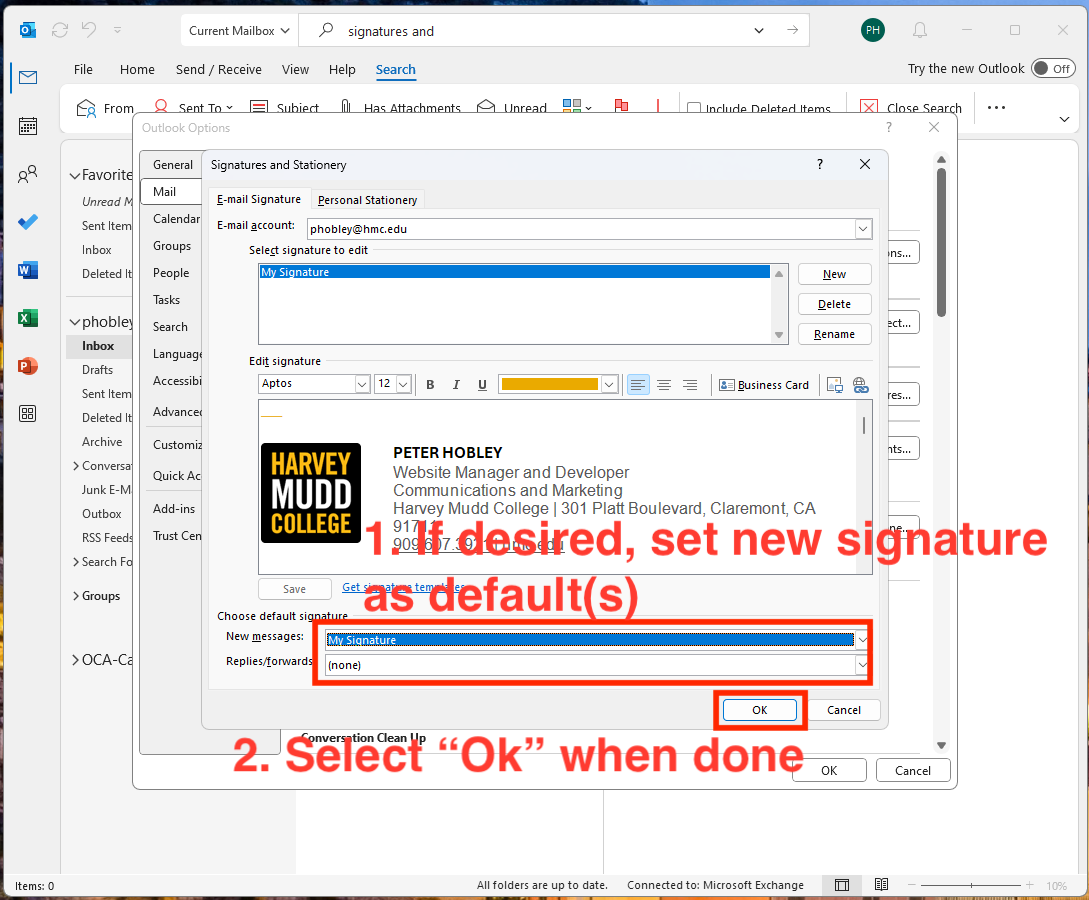
6. Set as default (optional)
- If desired, set the new signature as default for new and/or replies and forwards.
- When done, select Ok and close out of the settings.
Outlook for Windows (New)
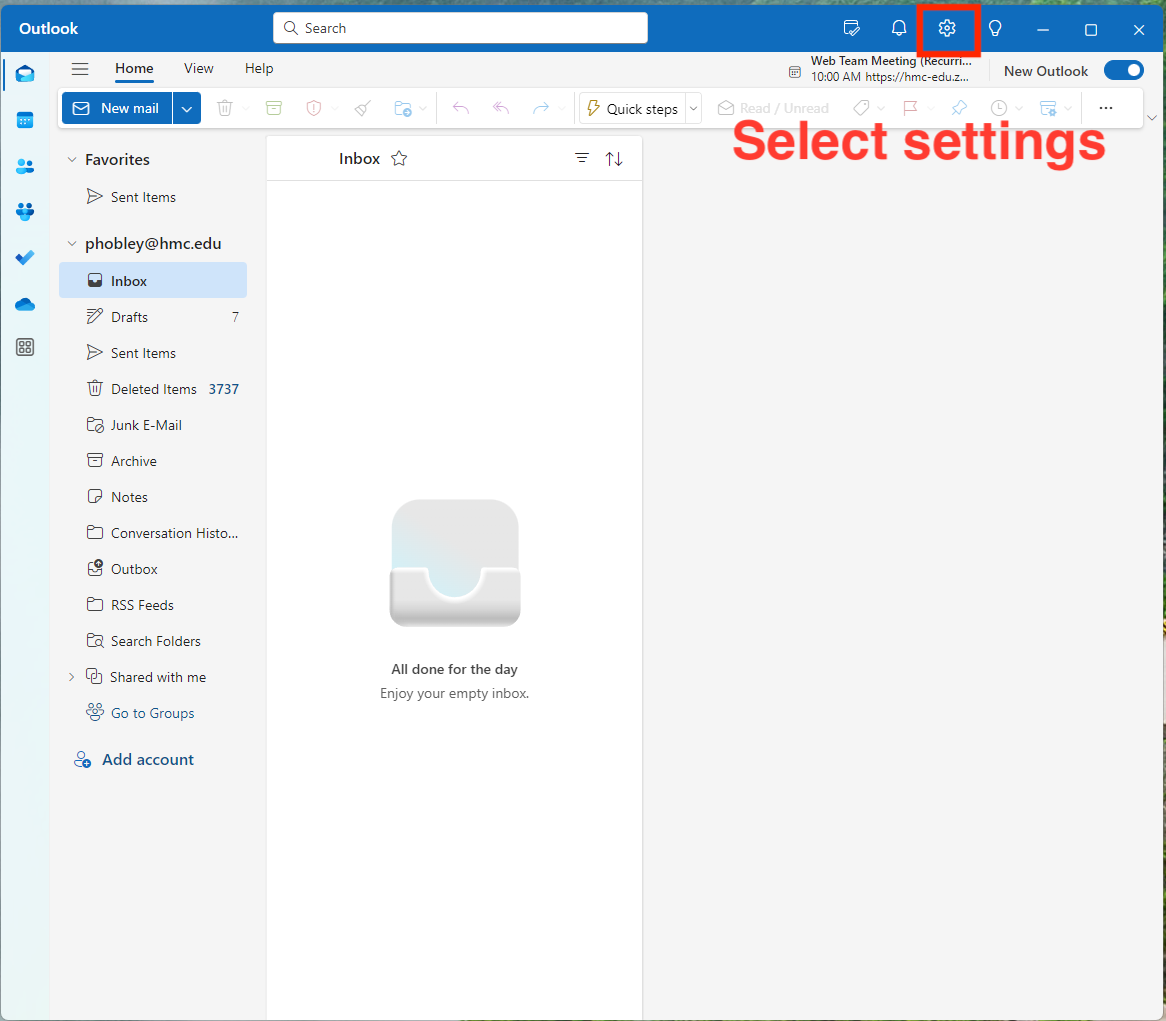
1. Select the settings gear icon
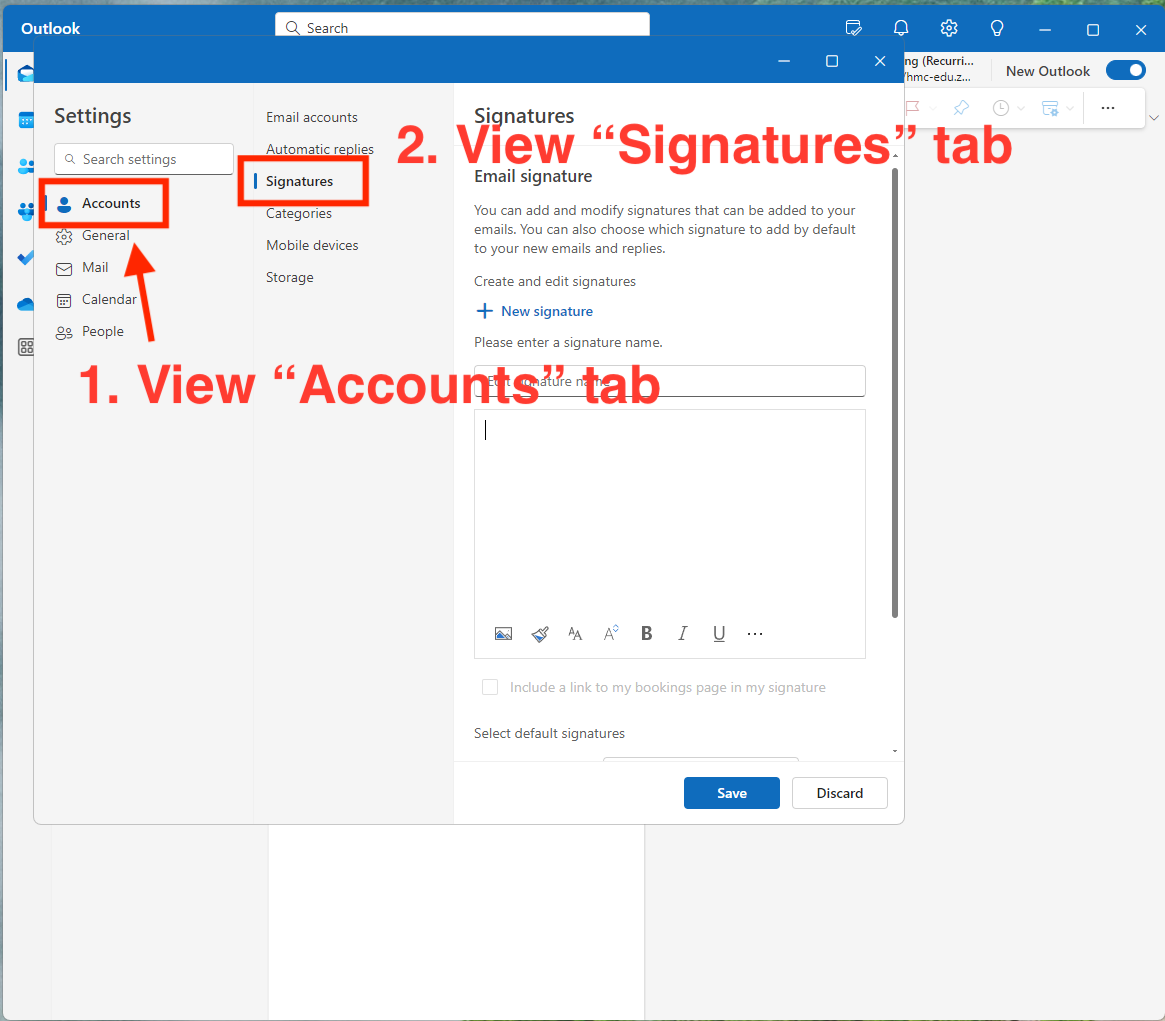
2. Select “Signatures” tab
- Ensure the Accounts tab is selected
- Ensure the Signatures tab is selected
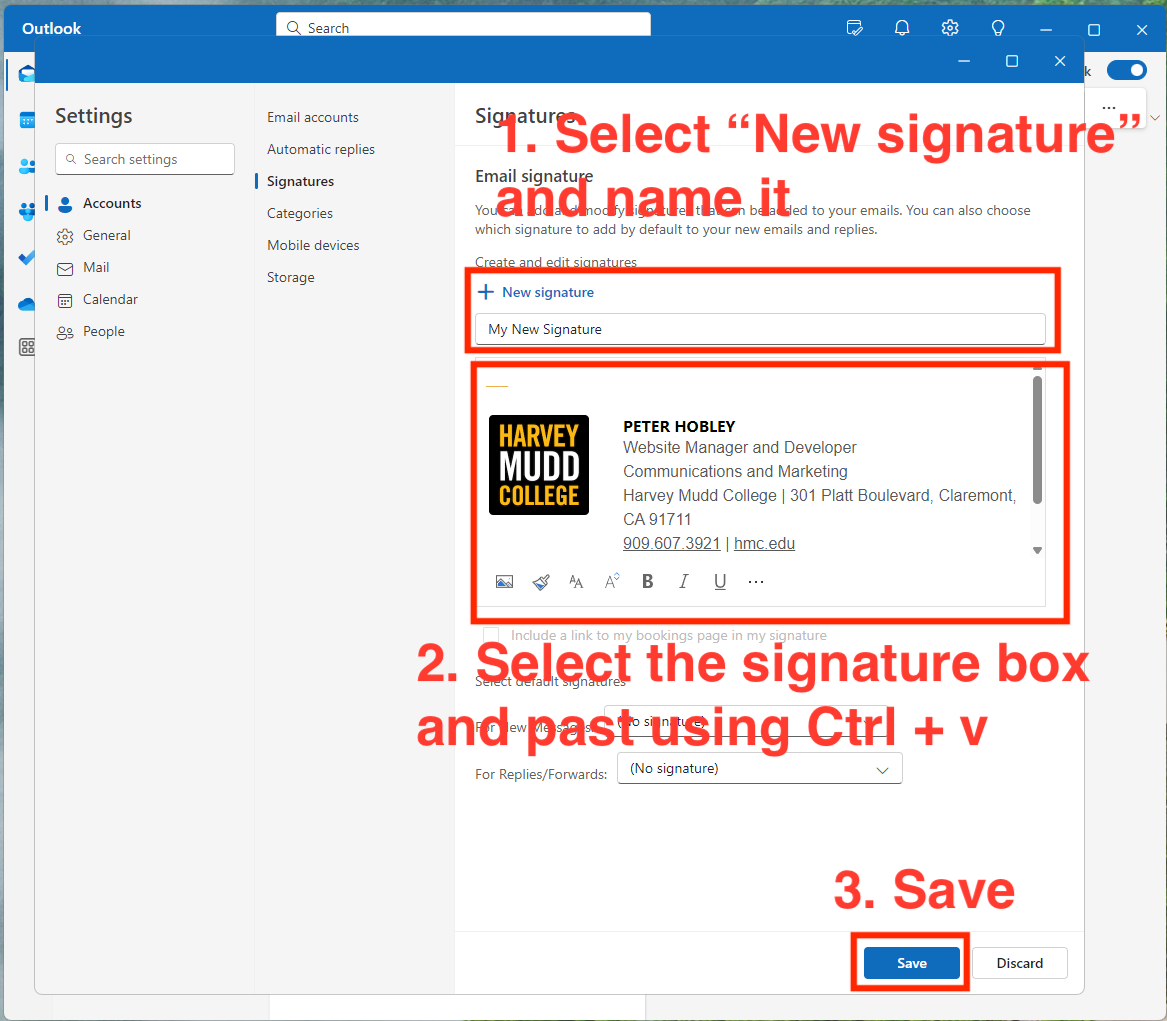
3. Paste signature
- Select New signature and name your new signature
- Select the signature box and to maintain the styling, after copying the signature from the generator, use Ctrl + v to paste it
- Save your new signature
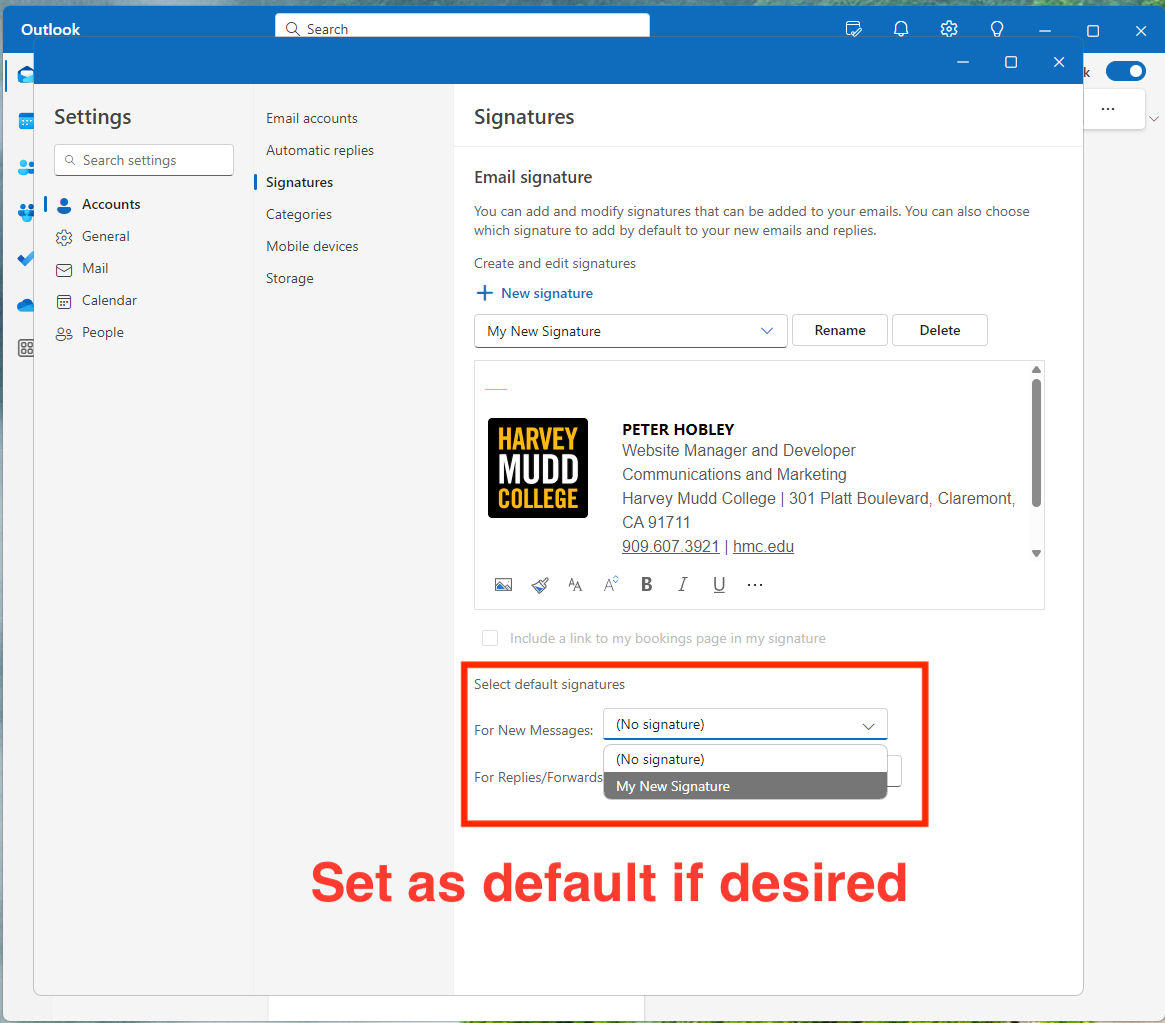
4. Set as default (optional)
Gmail (Web)
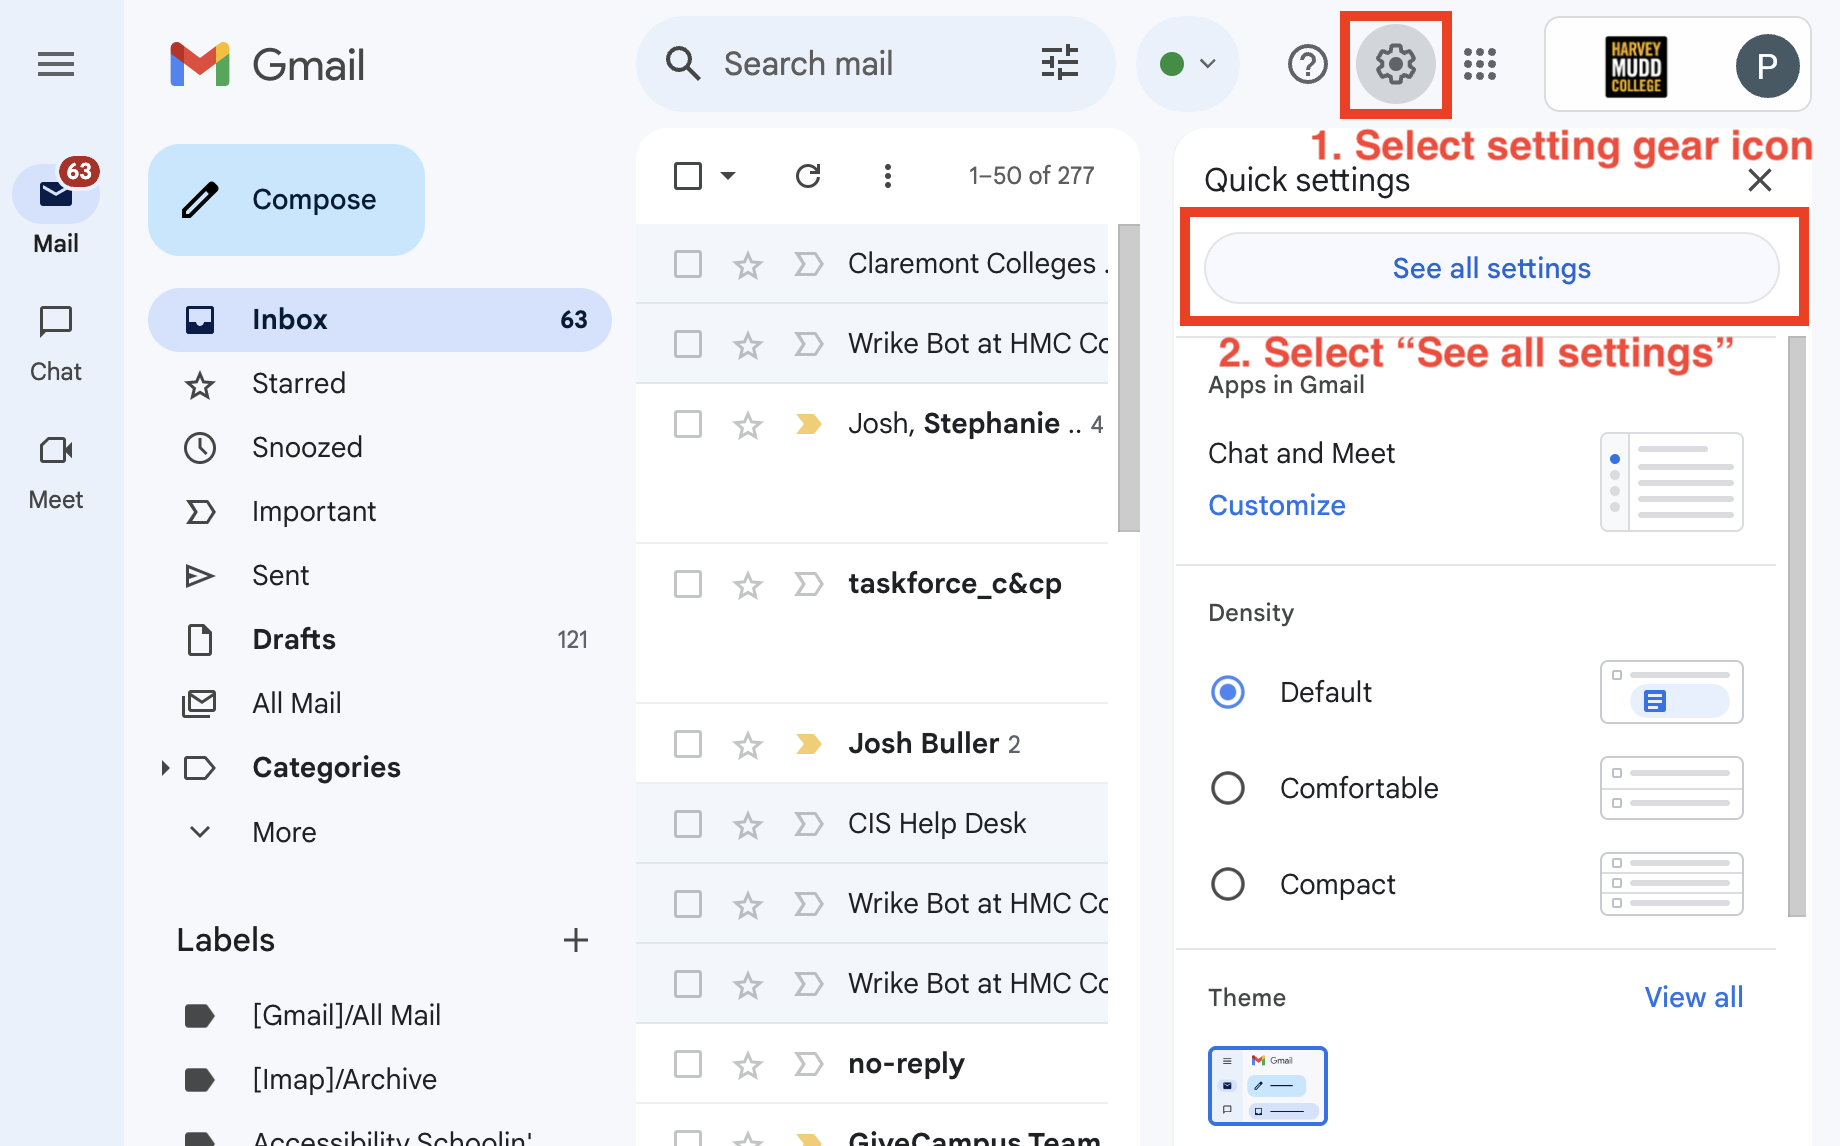
1. Open settings
- Select the settings gear icon
- Select the See all settings button
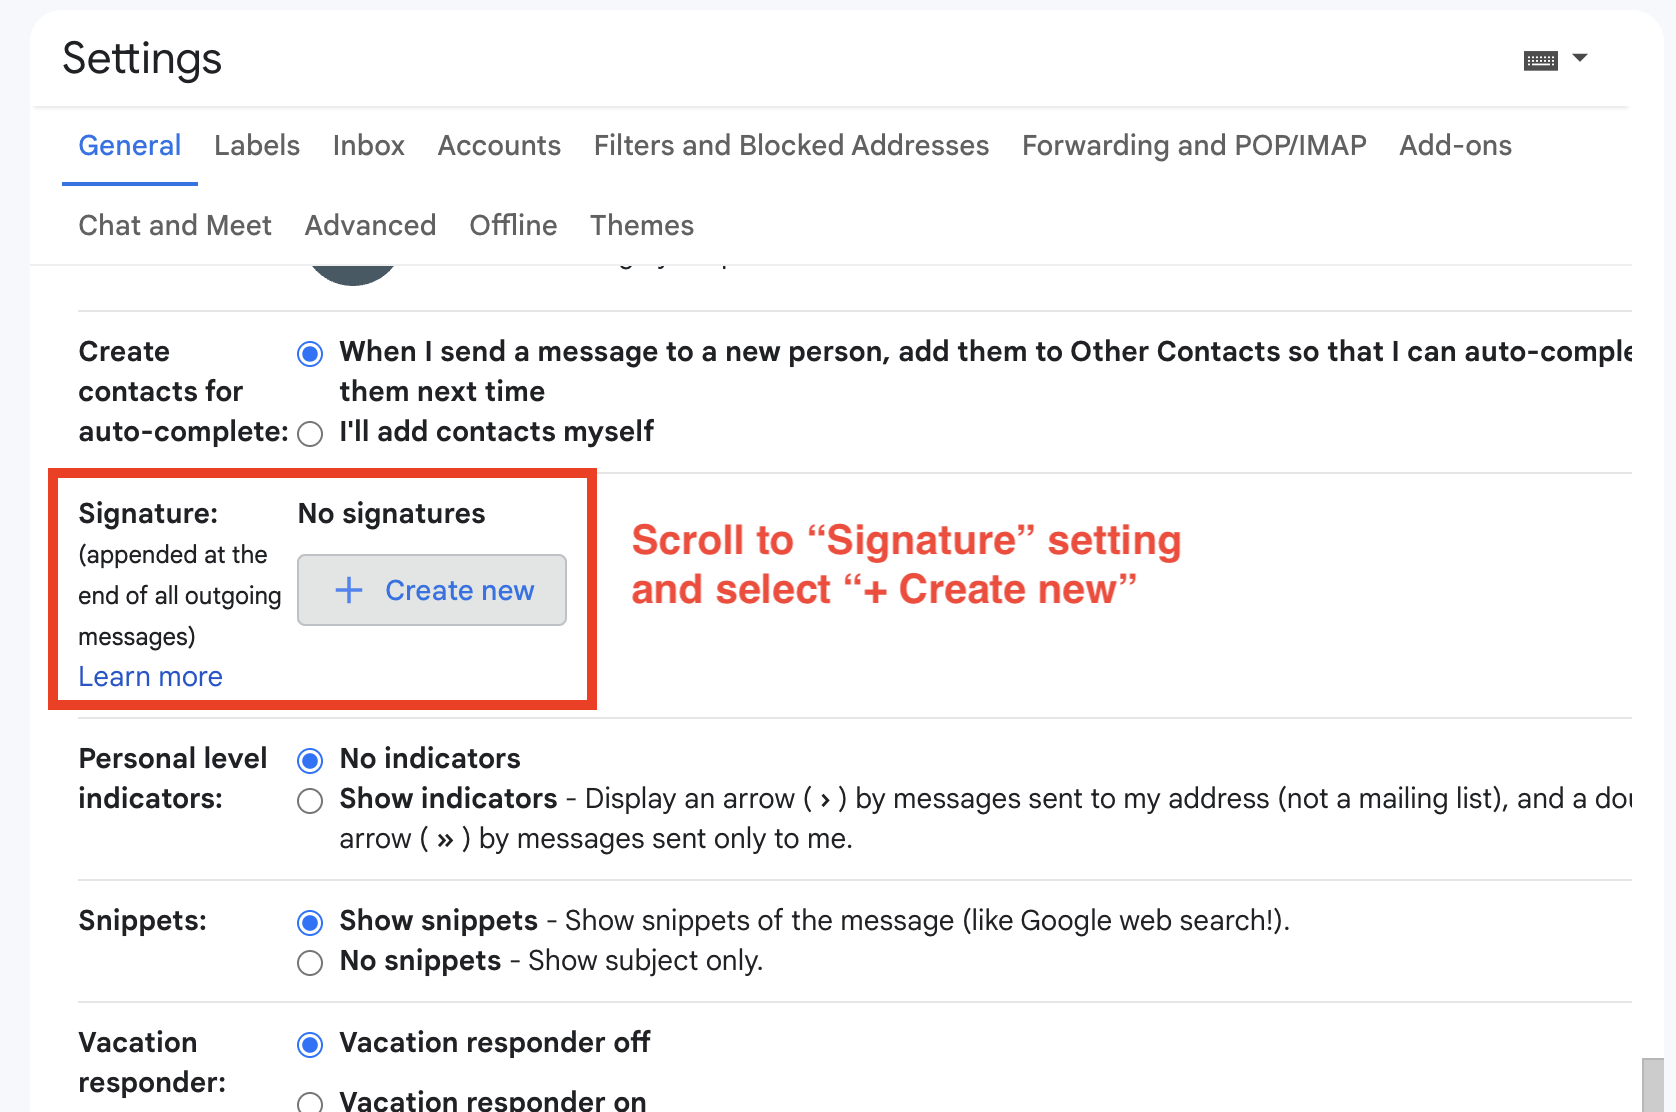
2. Create new signature
- Scroll down to the Signature section
- Select the + Create new button
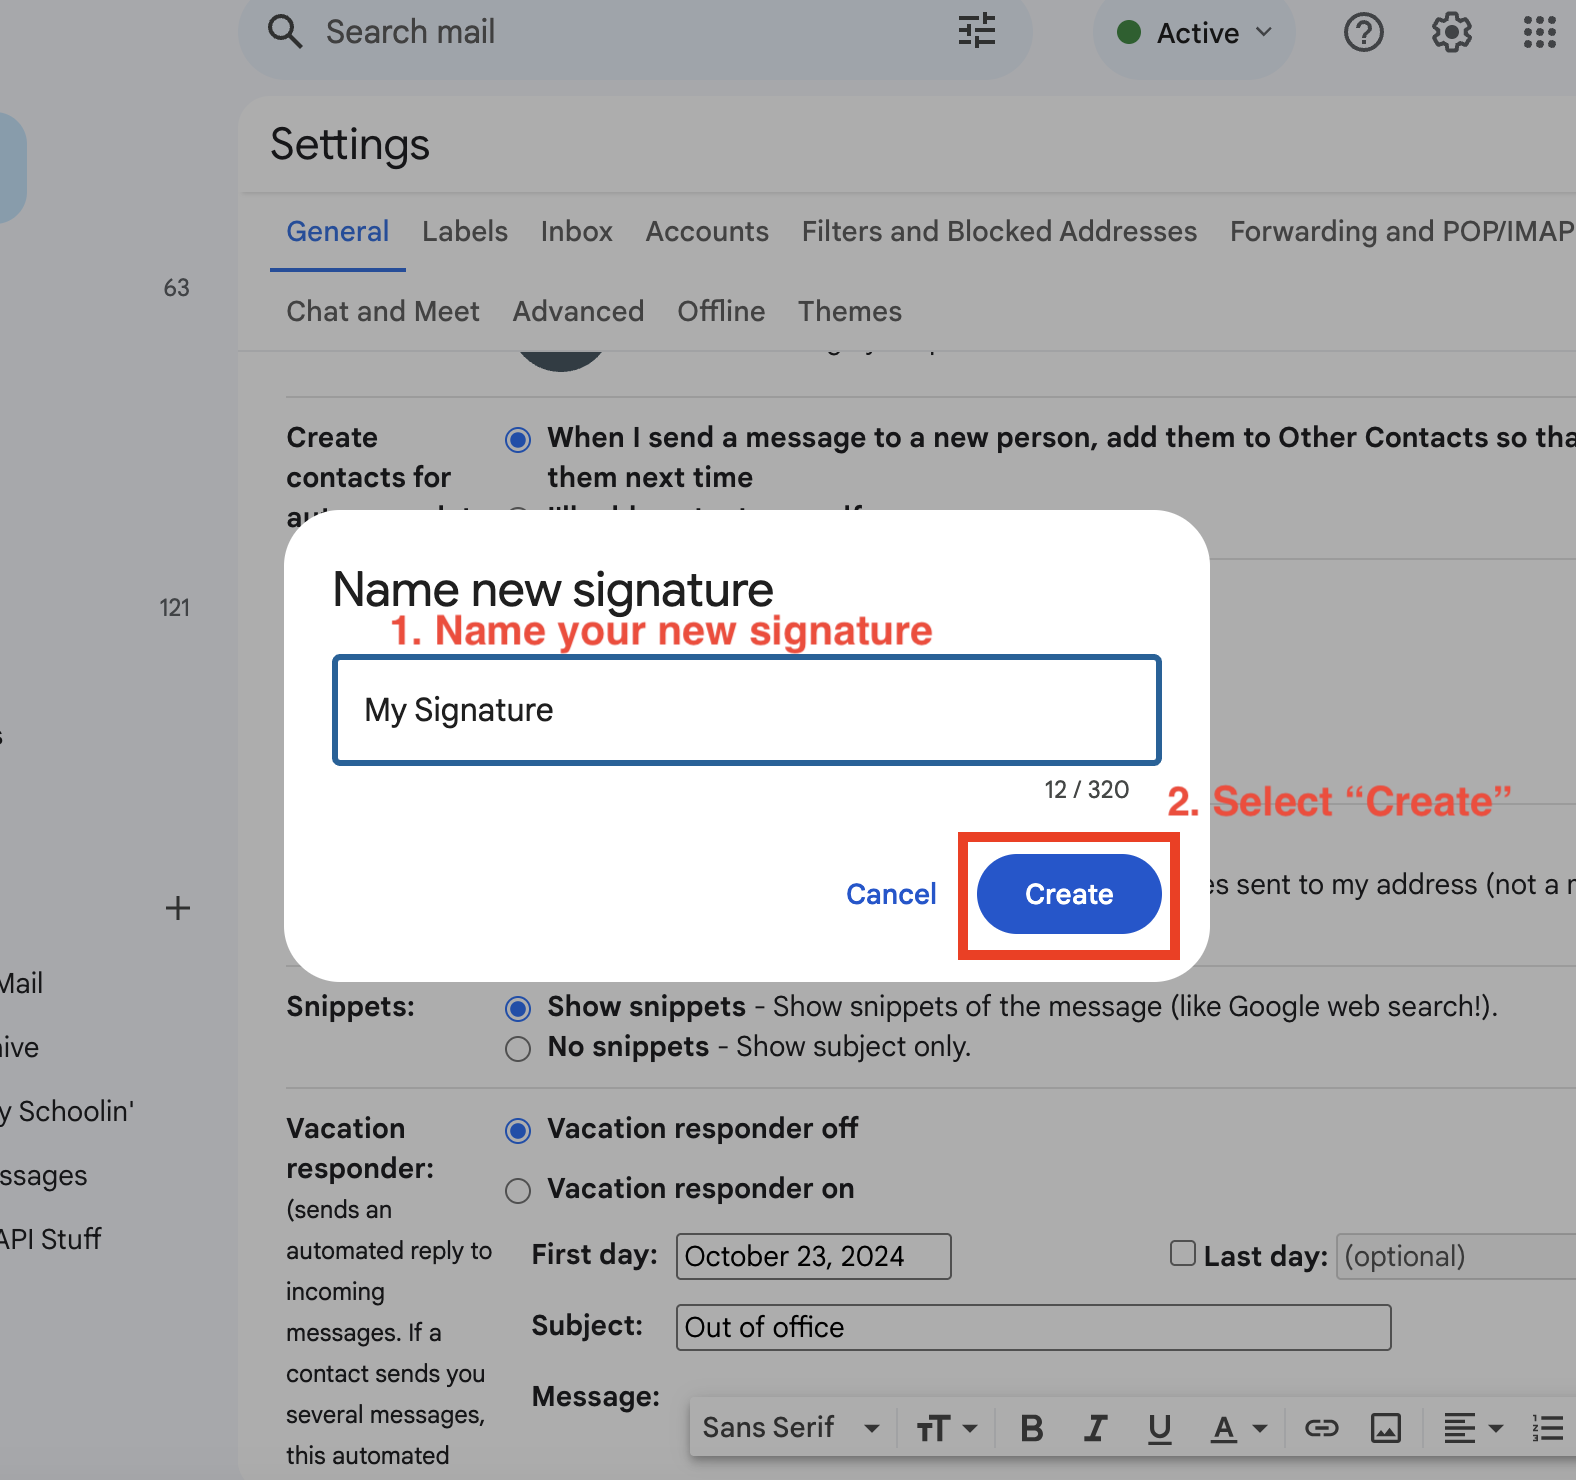
3. Name your new signature
- Name the signature
- Select the Create button
4. Paste your new signature
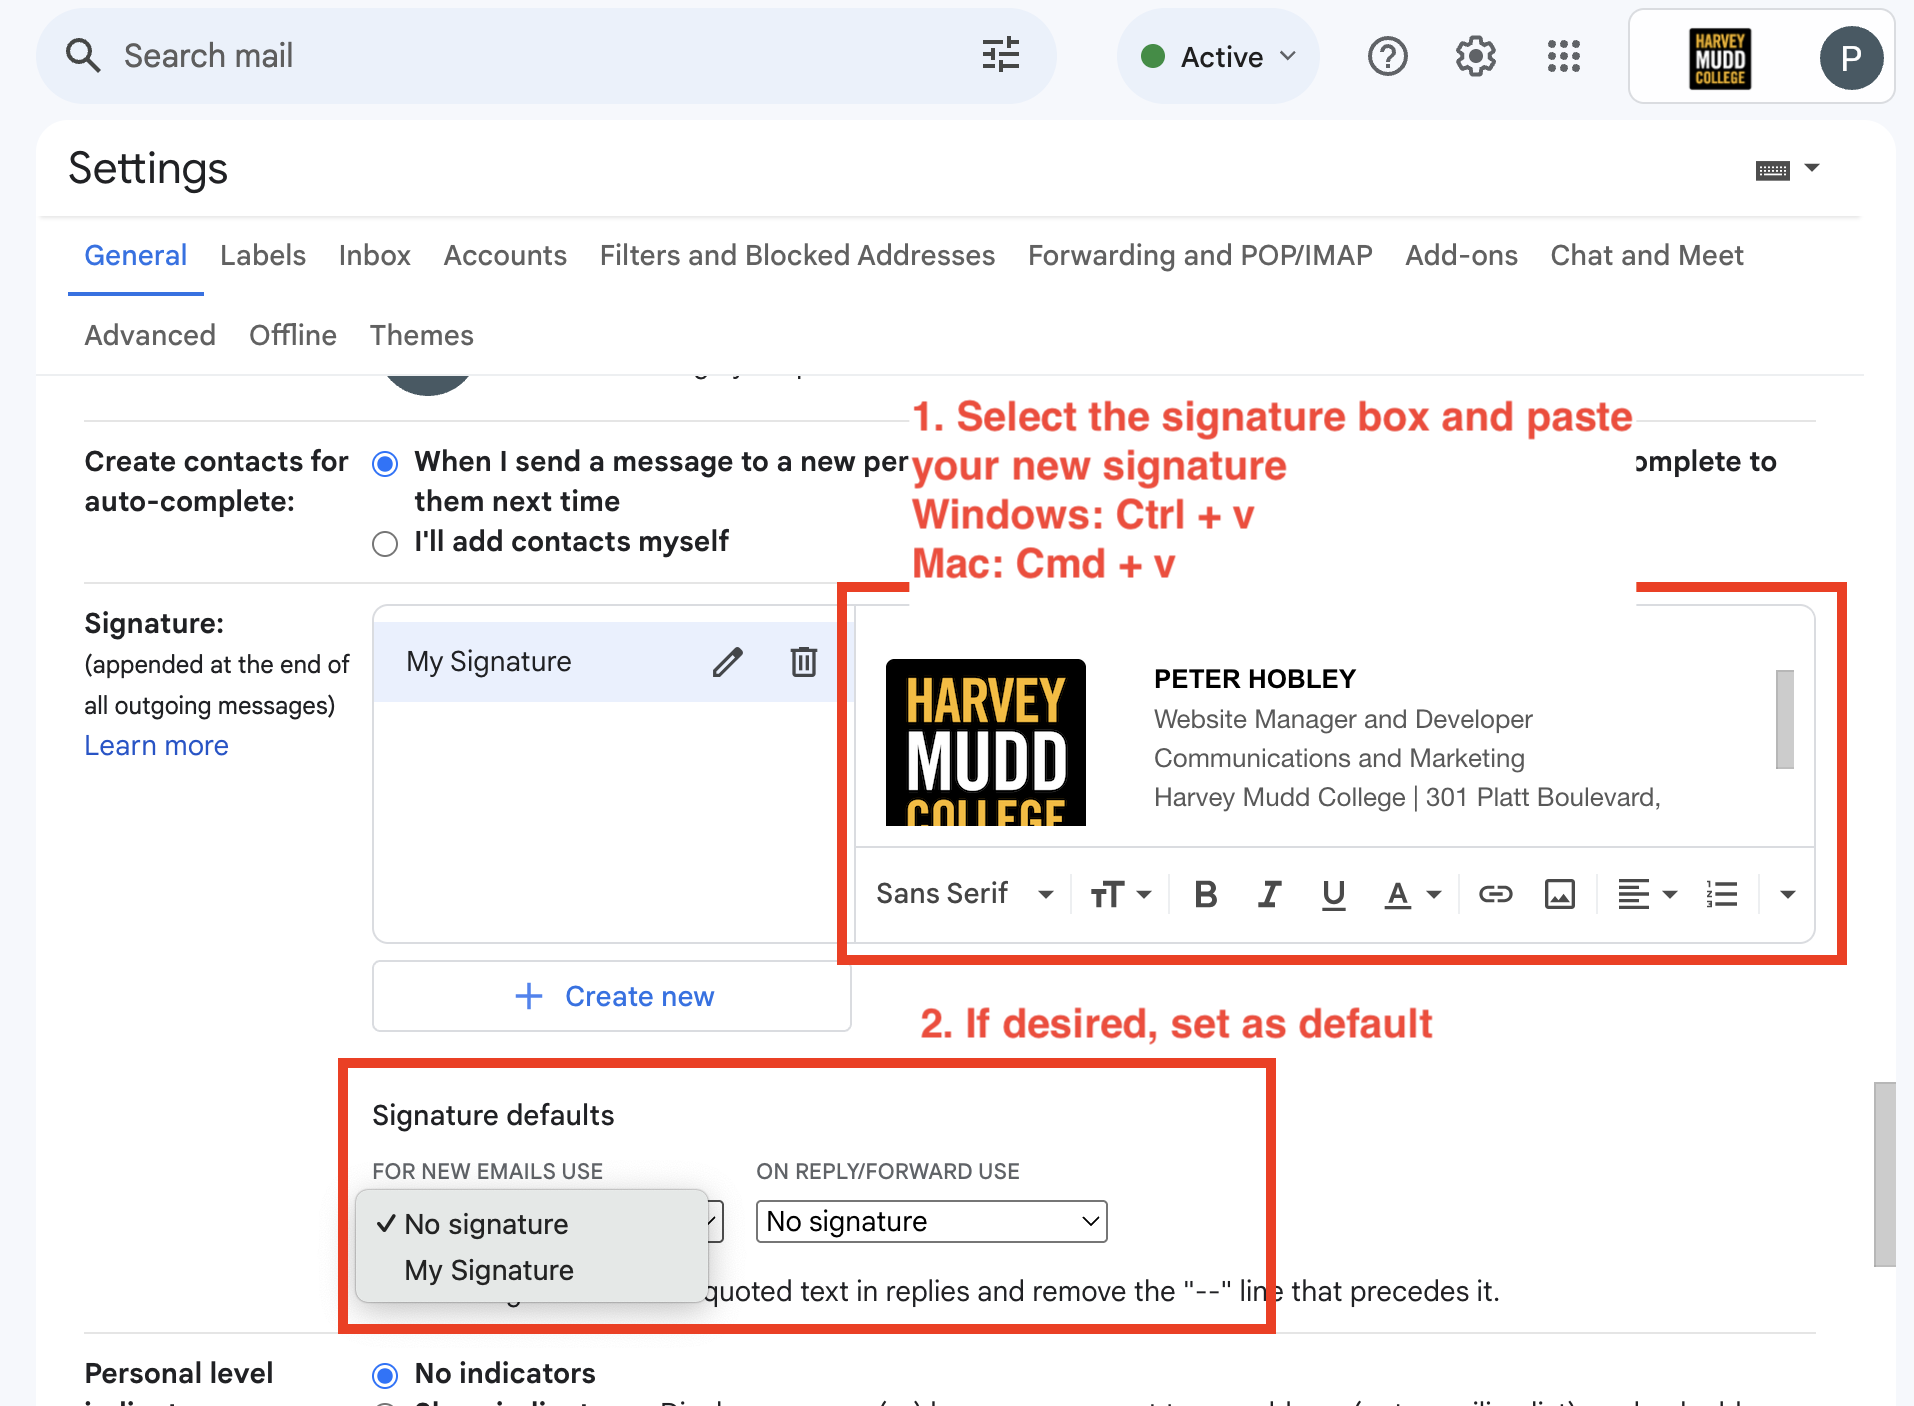
- Select the signature box and paste in your new signature:
- Windows: Ctrl + v
- Mac: Cmd + v
- If desired, set the signature using the defaults dropdowns
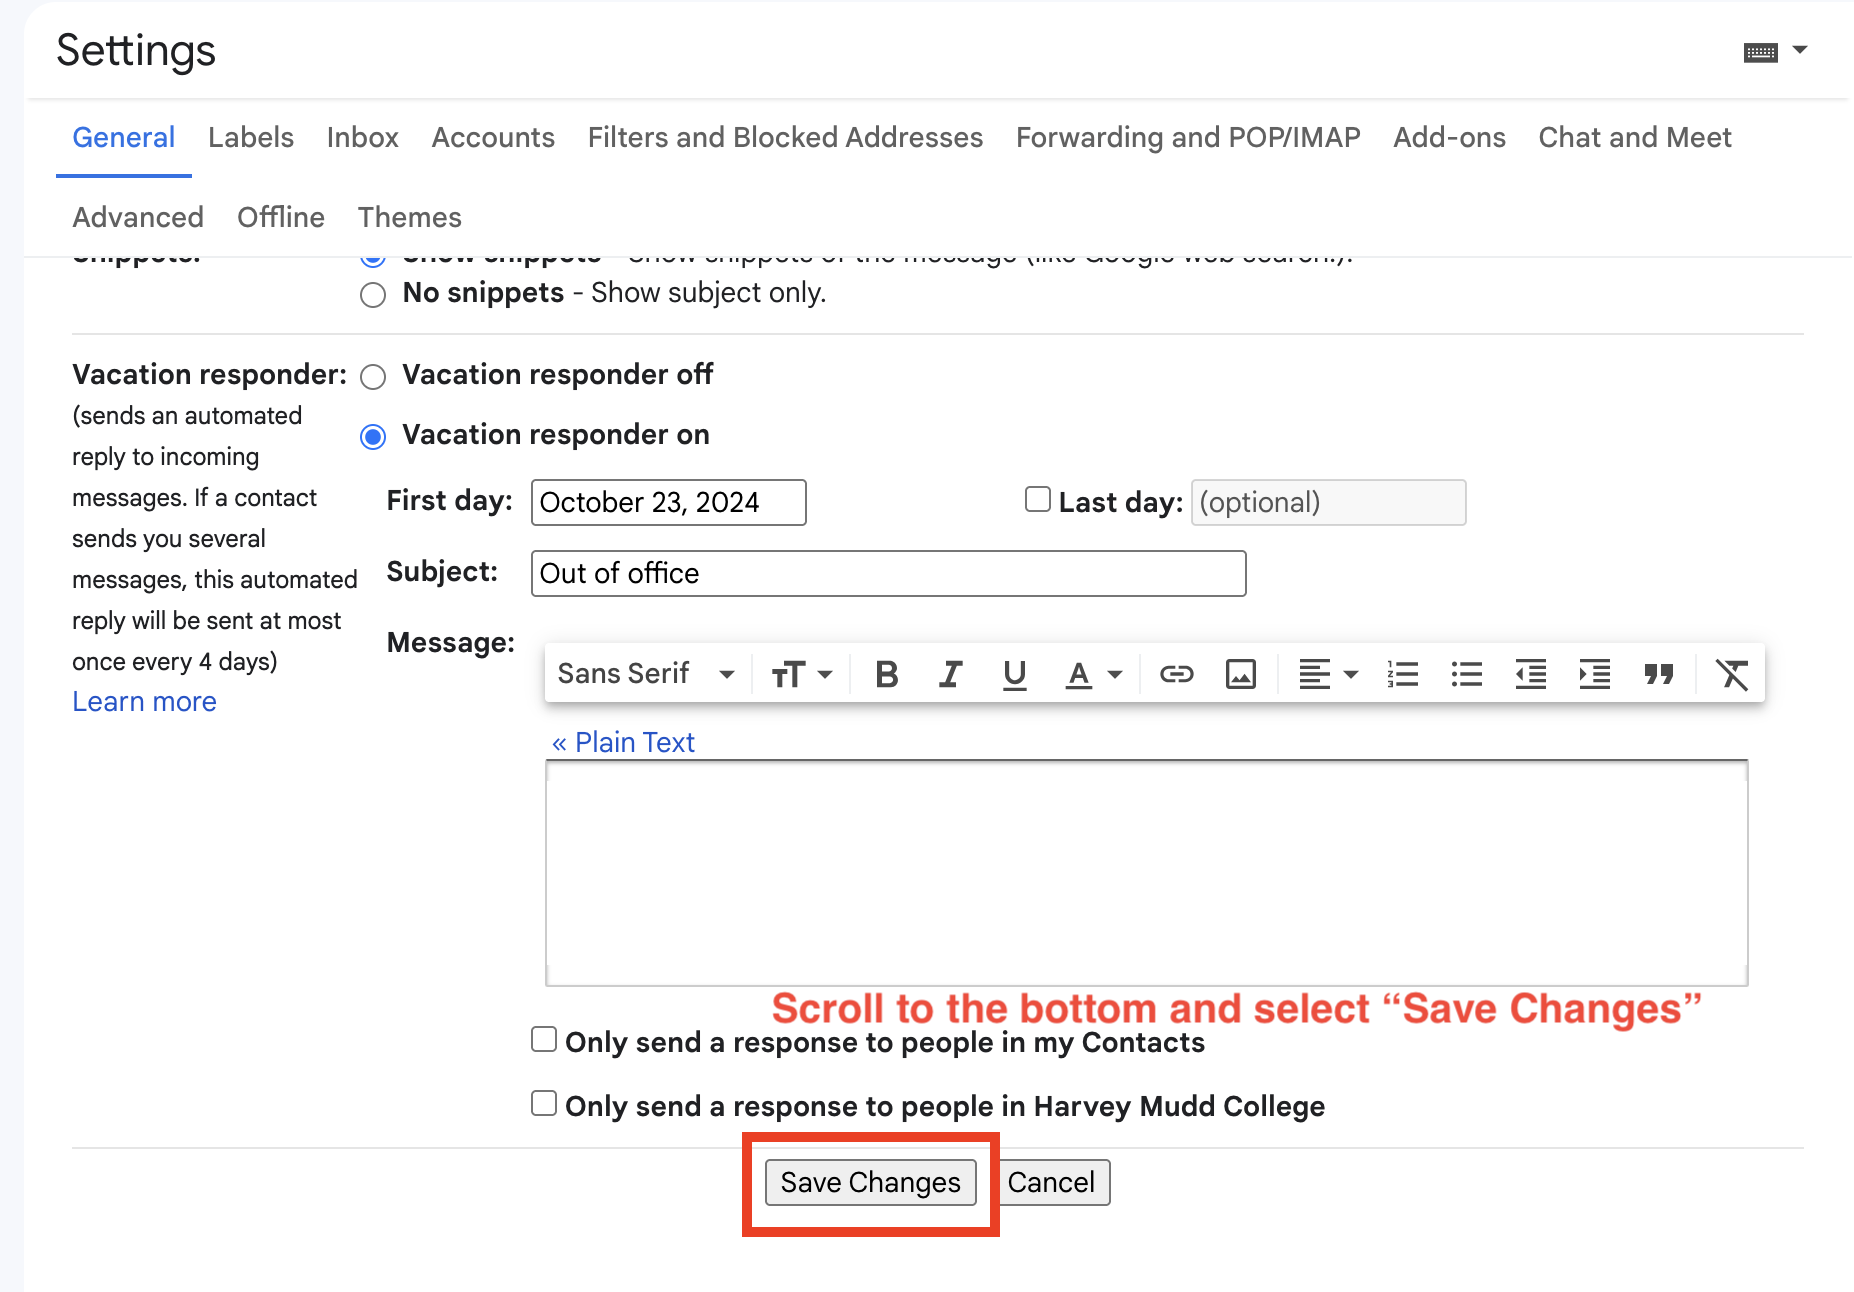
5. Don’t forget to save!
macOS Mail
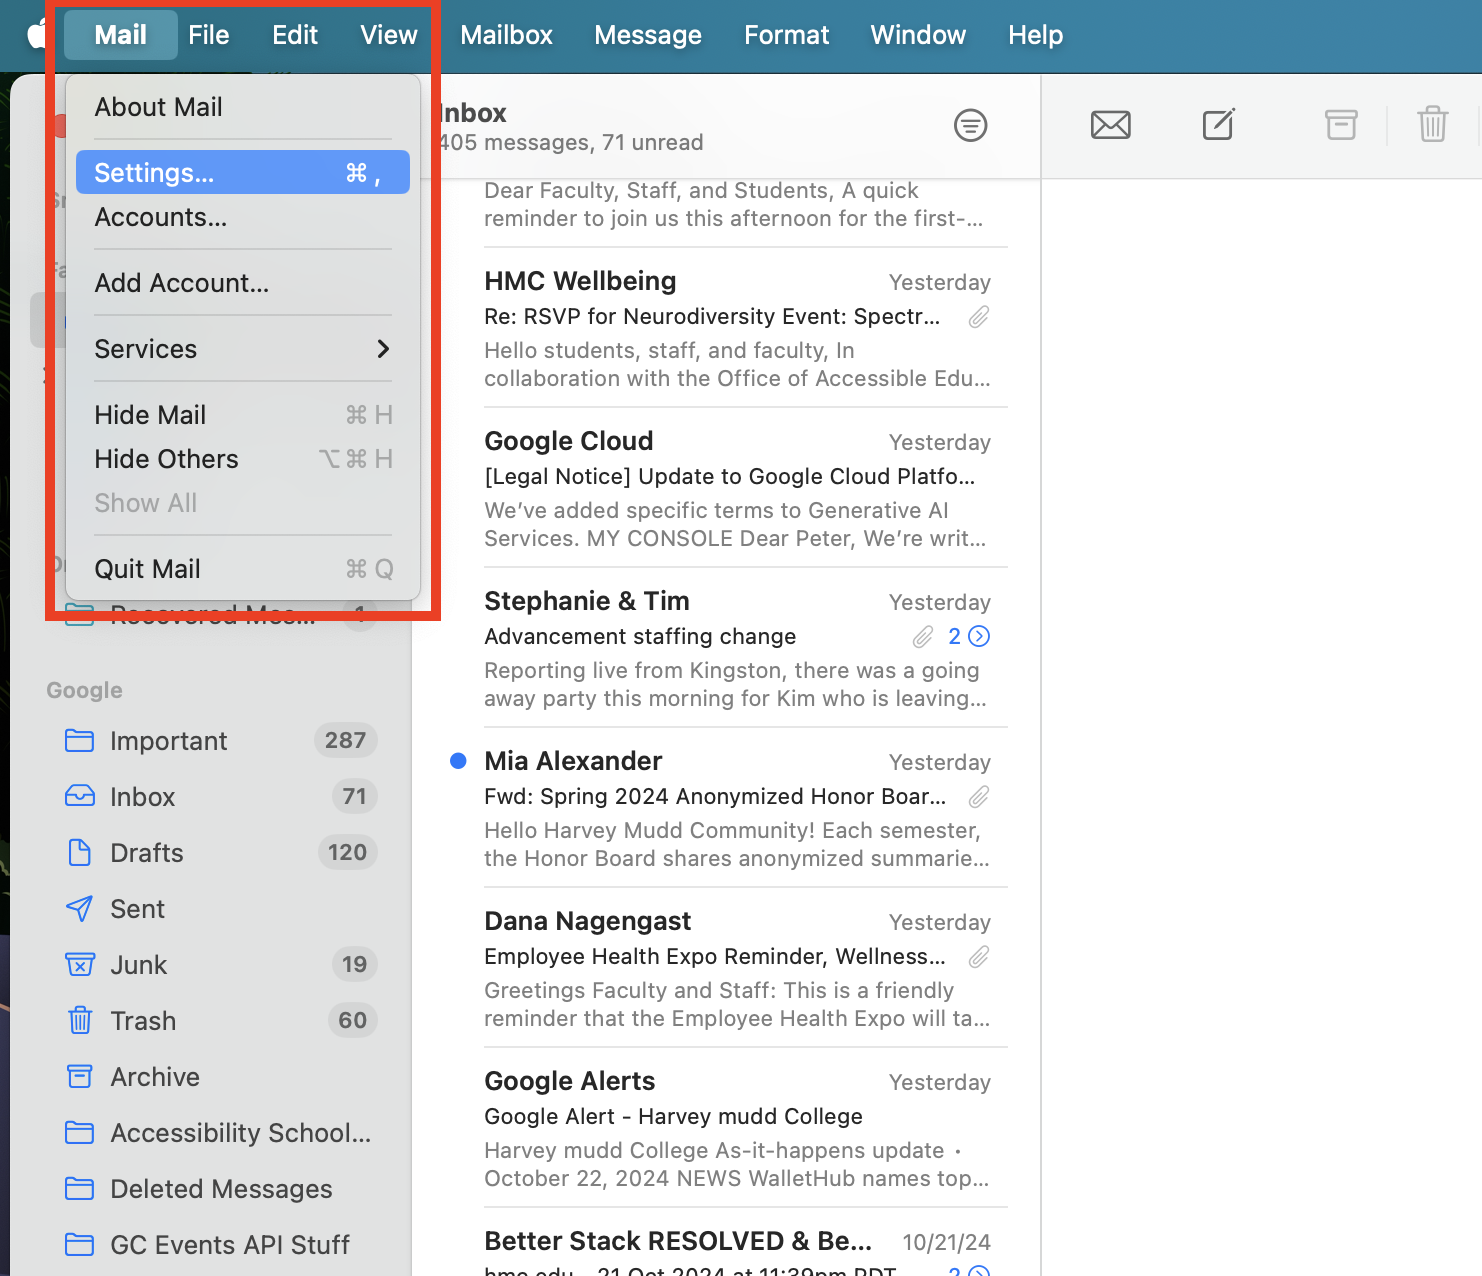
1. Open Mail settings
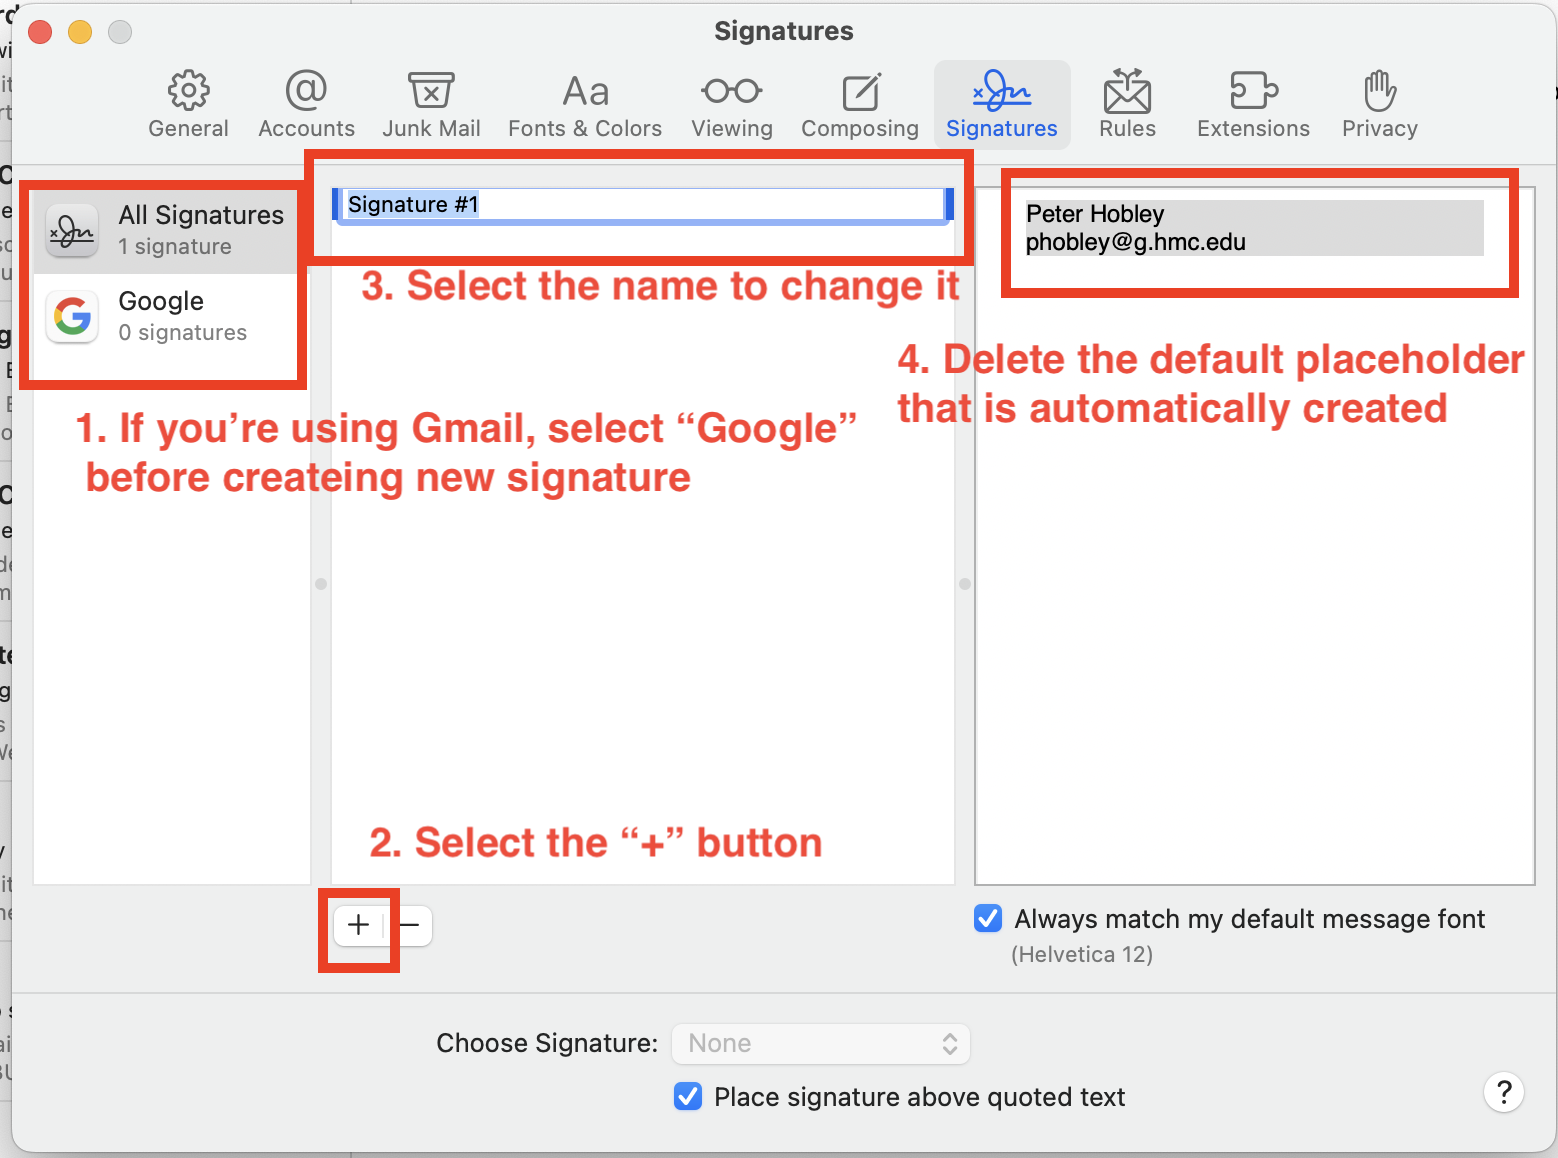
2. Create new signature
- Note: if you’re using Gmail, make sure to select Google in the left pane before creating your new signature. If you don’t, it won’t be available as an option when creating new emails
- Select the + button
- Click on the name to change it, or leave as-is
- Delete the default placeholder text that will be automatically created
3. Paste in your new signature
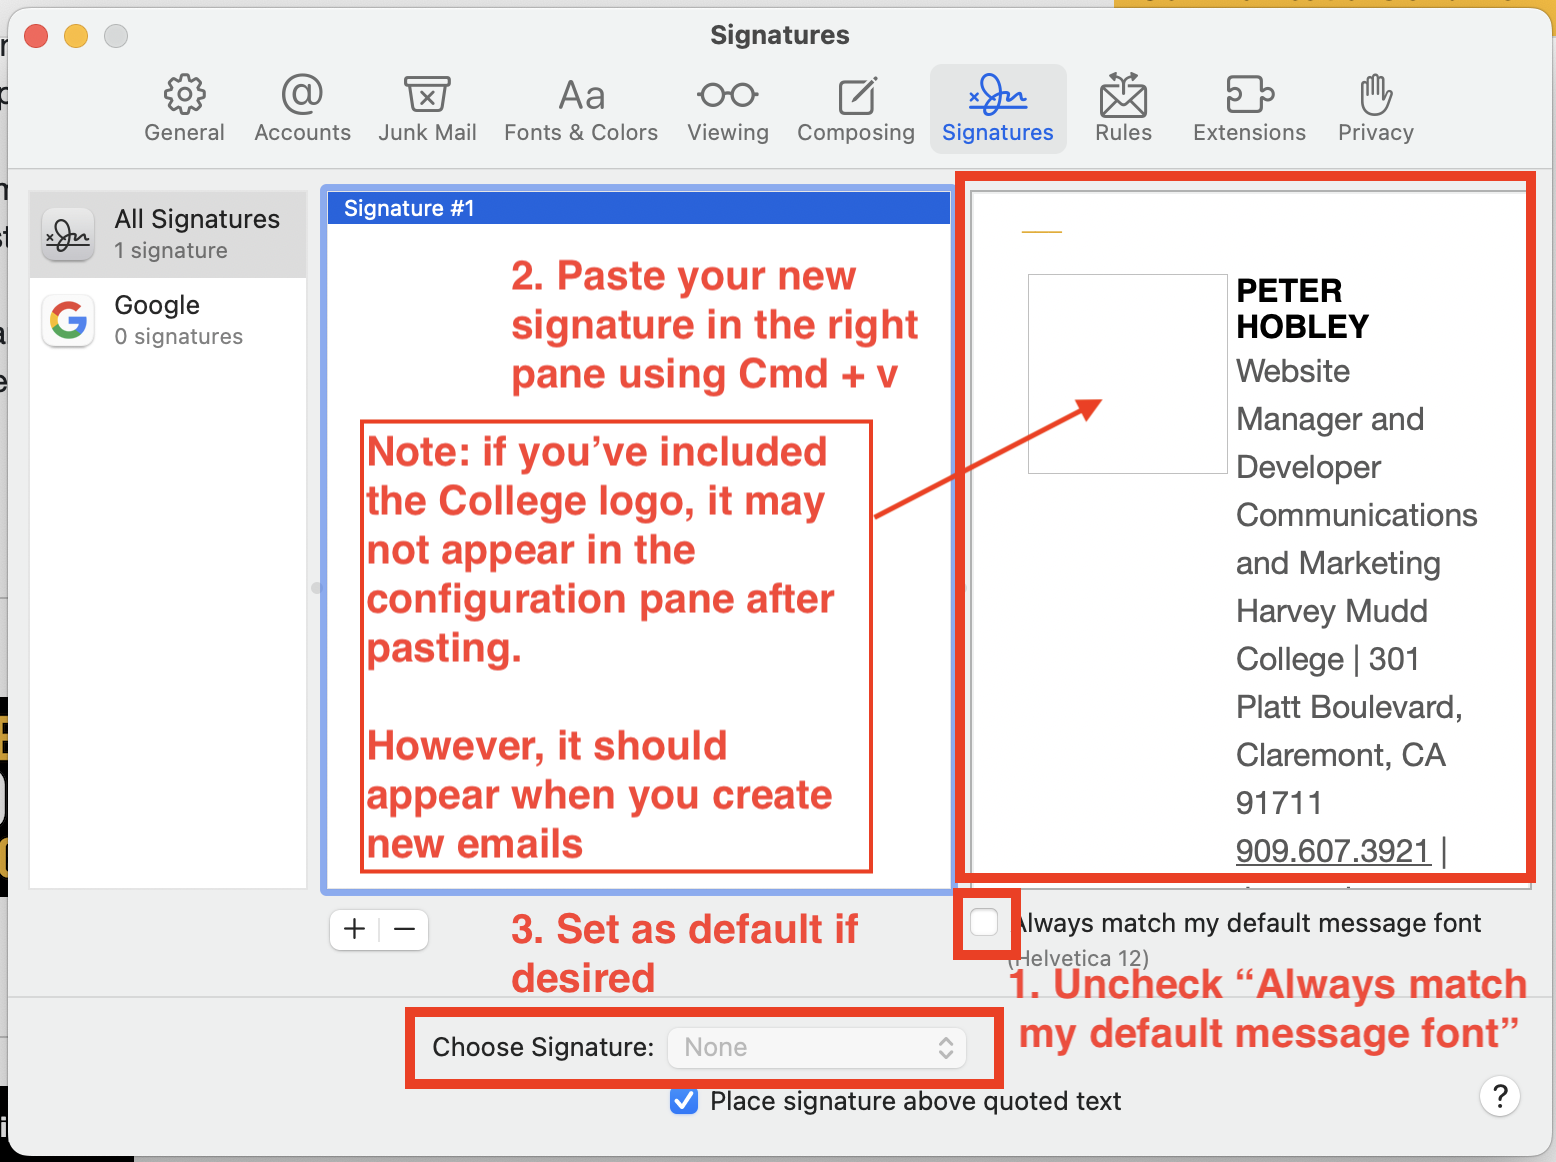
- Uncheck Always match my default message font
- Paste your new signature using Cmd + v
- Set as default if desired
Note: if you’ve opted to include the College logo, it may be appear in the configuration pane. However, it should be visible when you create new emails.
