WordPress: Page Parent and Menu Placement
If you create a new page, you will usually want to position it within the site hierarchy. There are two configurations to consider:
- Page parent
- Menu placement
Page Parent
When you create a new page, by default in the site hierarchy it sits one level below your particular site’s parent page. If that is where you would like the page to be positioned, no further action is required.
Take for example the History of Harvey Mudd College page. It is located on the About section of the website and appears in the breadcrumbs as a child of the About home page:

In the next example below, a page has been placed further down the hierarchy. The board members page is a child page of the college governance page, which in turn is in the default position of one level below the site home (in this case the president’s office):

Setting Page Parent
If you determine that a page you have created needs placing as a child of a page other than the site’s home, then you must set the parent accordingly.
On the right of the page is the settings sidebar.
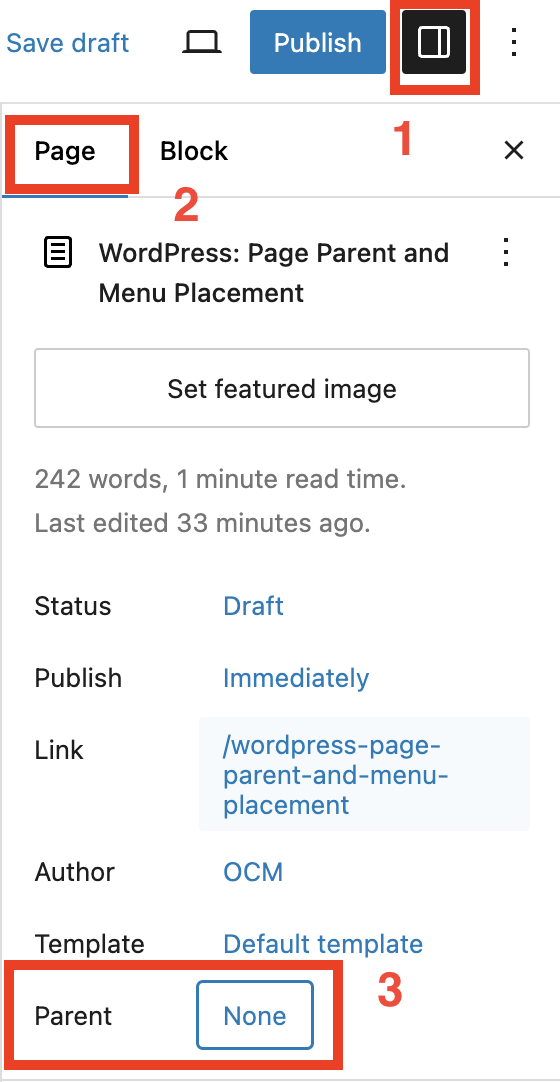
- If you don’t see the settings sidebar click the settings button
- Make sure the Page tab is selected
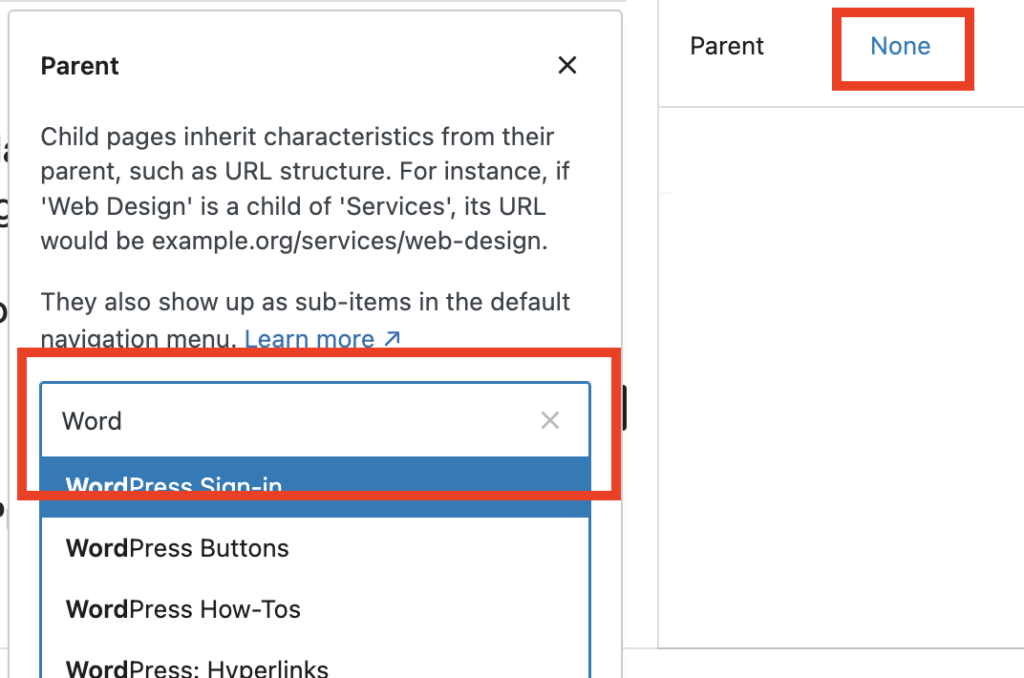
- Select the None button next to Parent
A box will pop up allowing you to search for and select the parent page:
Menu Placement
For users to be able to navigate to your page, it needs to be added to the dropdown menu.
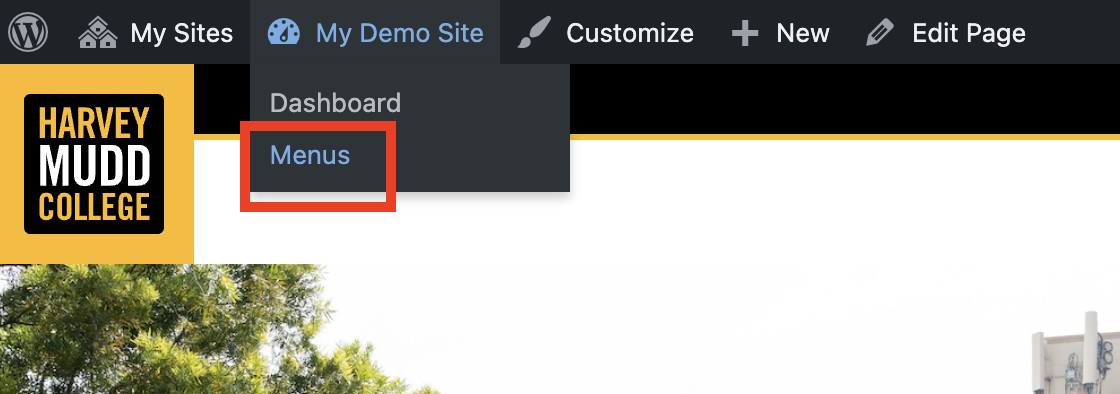
Hover over the site name in the admin bar and select Menus:
You will be taken to a representation of the menu with each menu item a separate bar that can be dragged and dropped into the desired position.
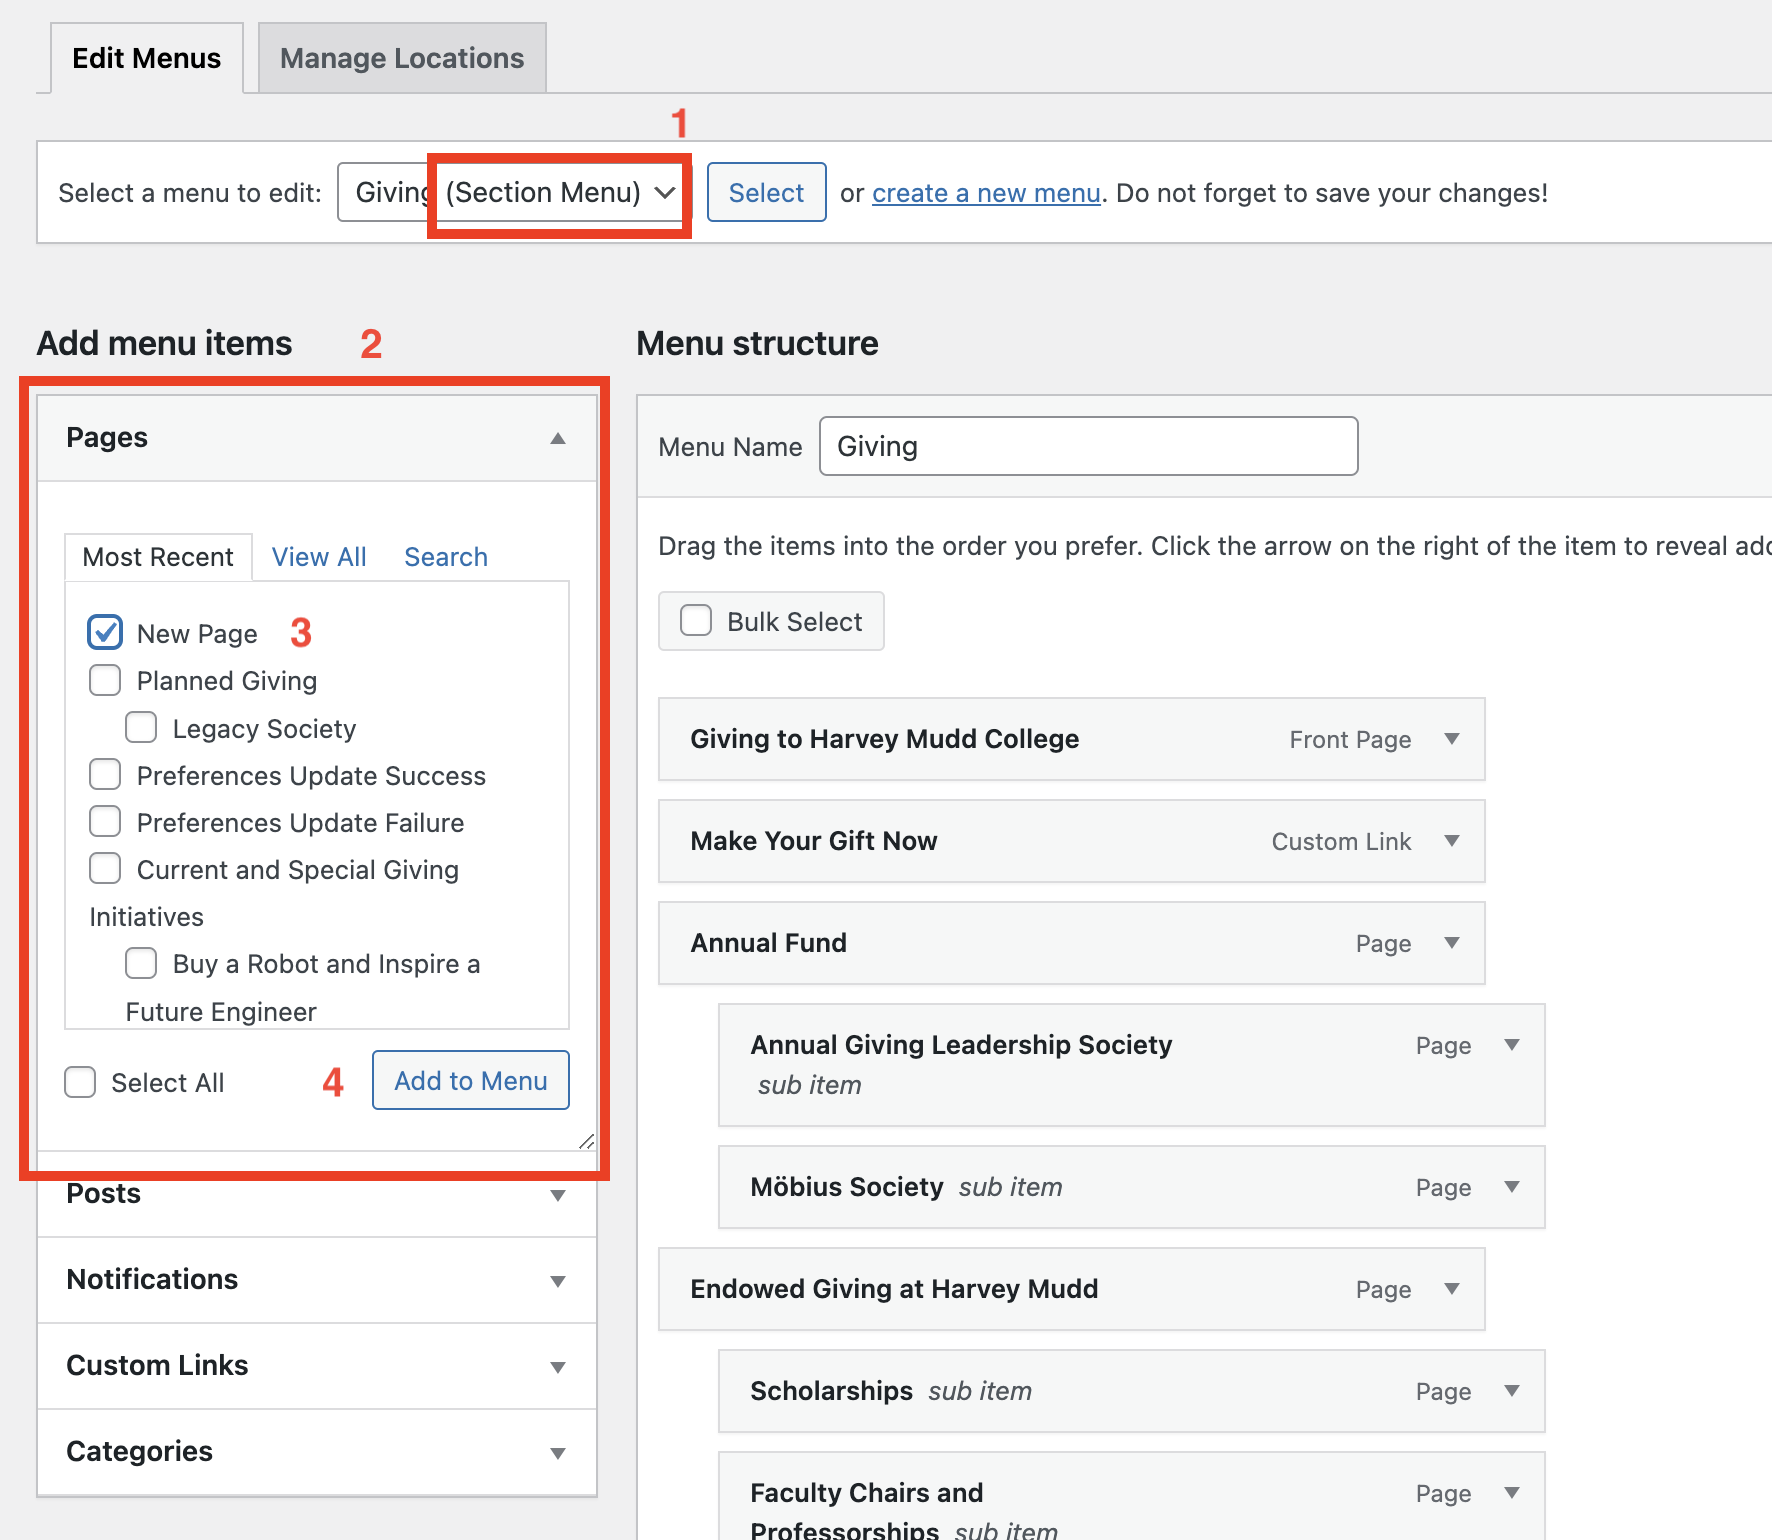
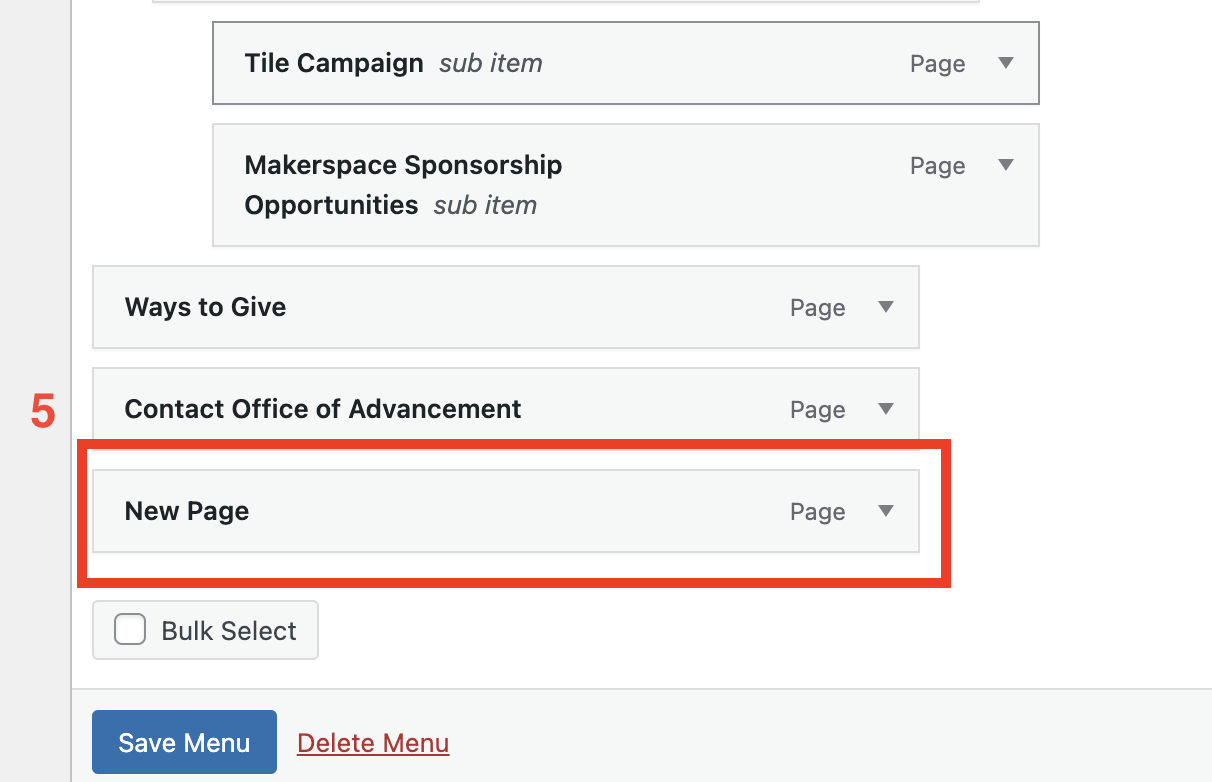
Follow these steps (the numbers correspond to markup on the images below):
- Make sure you are viewing the Section Menu of the site (in this example it is from the Giving site). If necessary, select it from the dropdown.
- Locate your page in the Add menu items section. New pages will automatically be at the top of the Recents list. In this example, a page called New Page is shown.
- Check the box next to the page(s) you wish to add to the menu.
- Select Add to menu.
- Your page(s) will be added to the bottom of the Menu structure tree on the right.
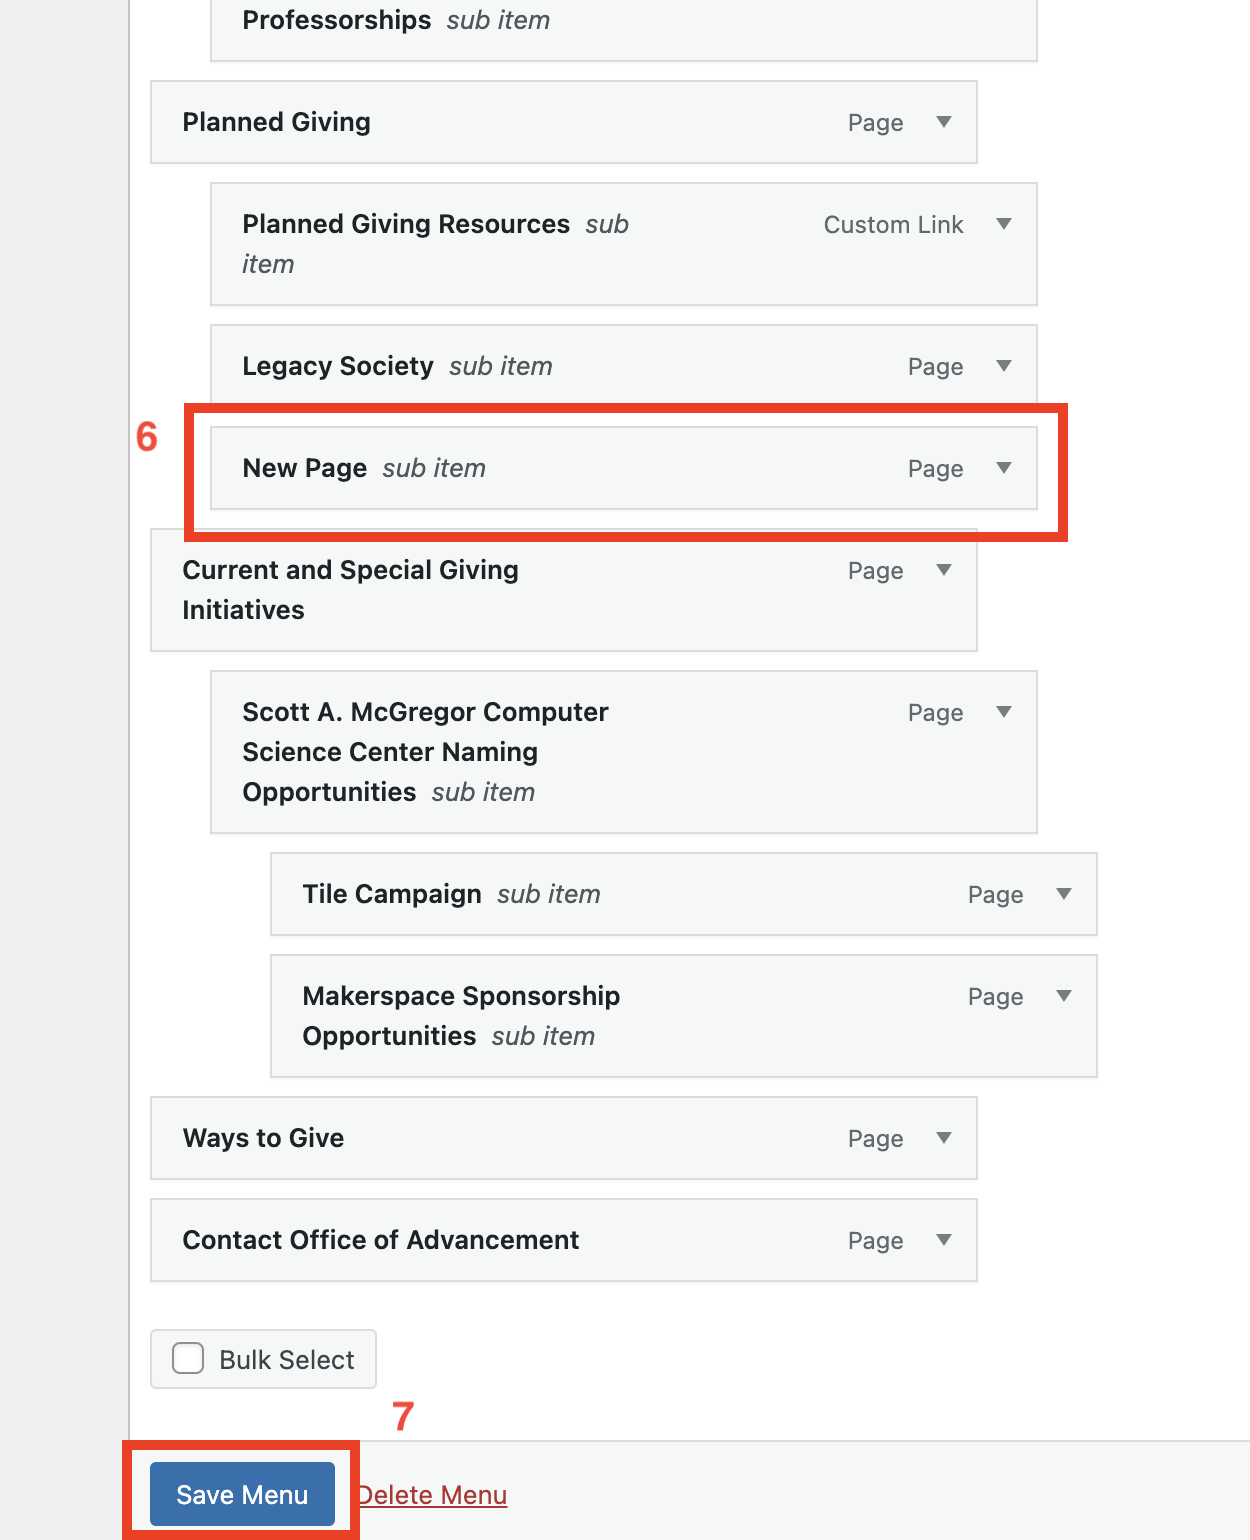
- Drag and drop the menu item to the desired location.
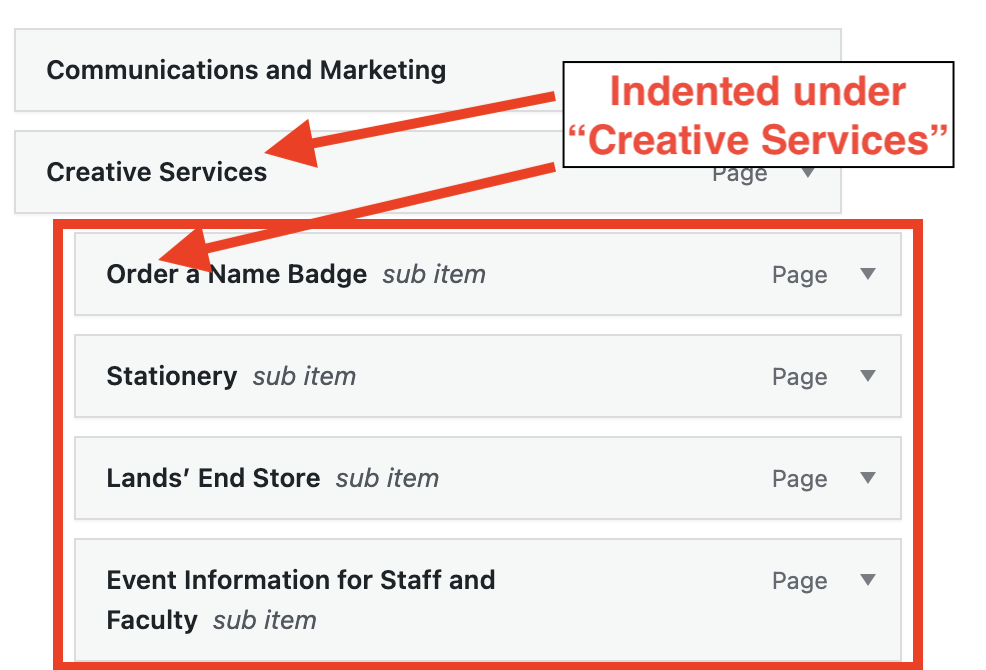
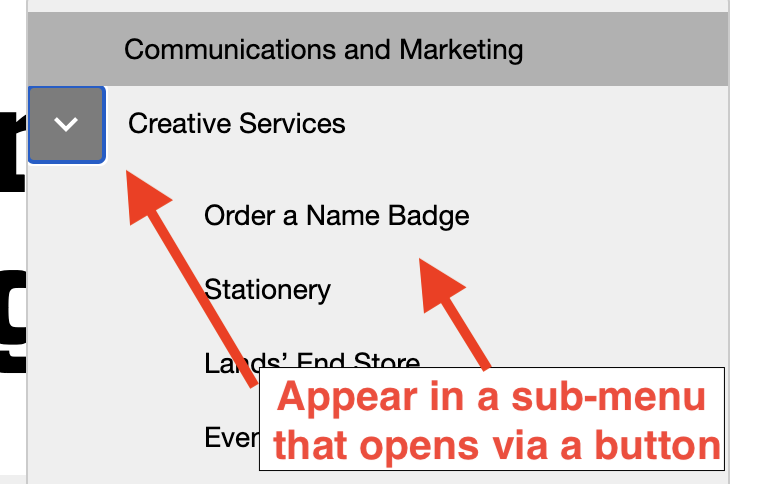
- Note: if you have set a parent for the page you have added to the menu, make sure you indent it underneath the parent item. This will ensure it is a sub-menu item when viewed on the front-end (refer to Indented Menu Items Example).
- Select Save Menu before exiting.
Indented Menu Items Example
The images below show how menu items indented on the menu admin page appear when viewed on the front-end.
